


Elevators 09-03 to 09-04 and a bit of 09-12!
Vans supply the elevator skins flat of course, but the left elevator accommodates the trim tab. This means there is a little tab to bend on the 2 left skins …. gulp! Obviously lots of jeopardy here, wrong bend direction, wrong place etc.

I took a long time to position the bend as advised by the manual, and clamped it in position between two blocks of plywood. I did a little practice on some scrap aluminium too. Deep breath and started bending using a block of wood.
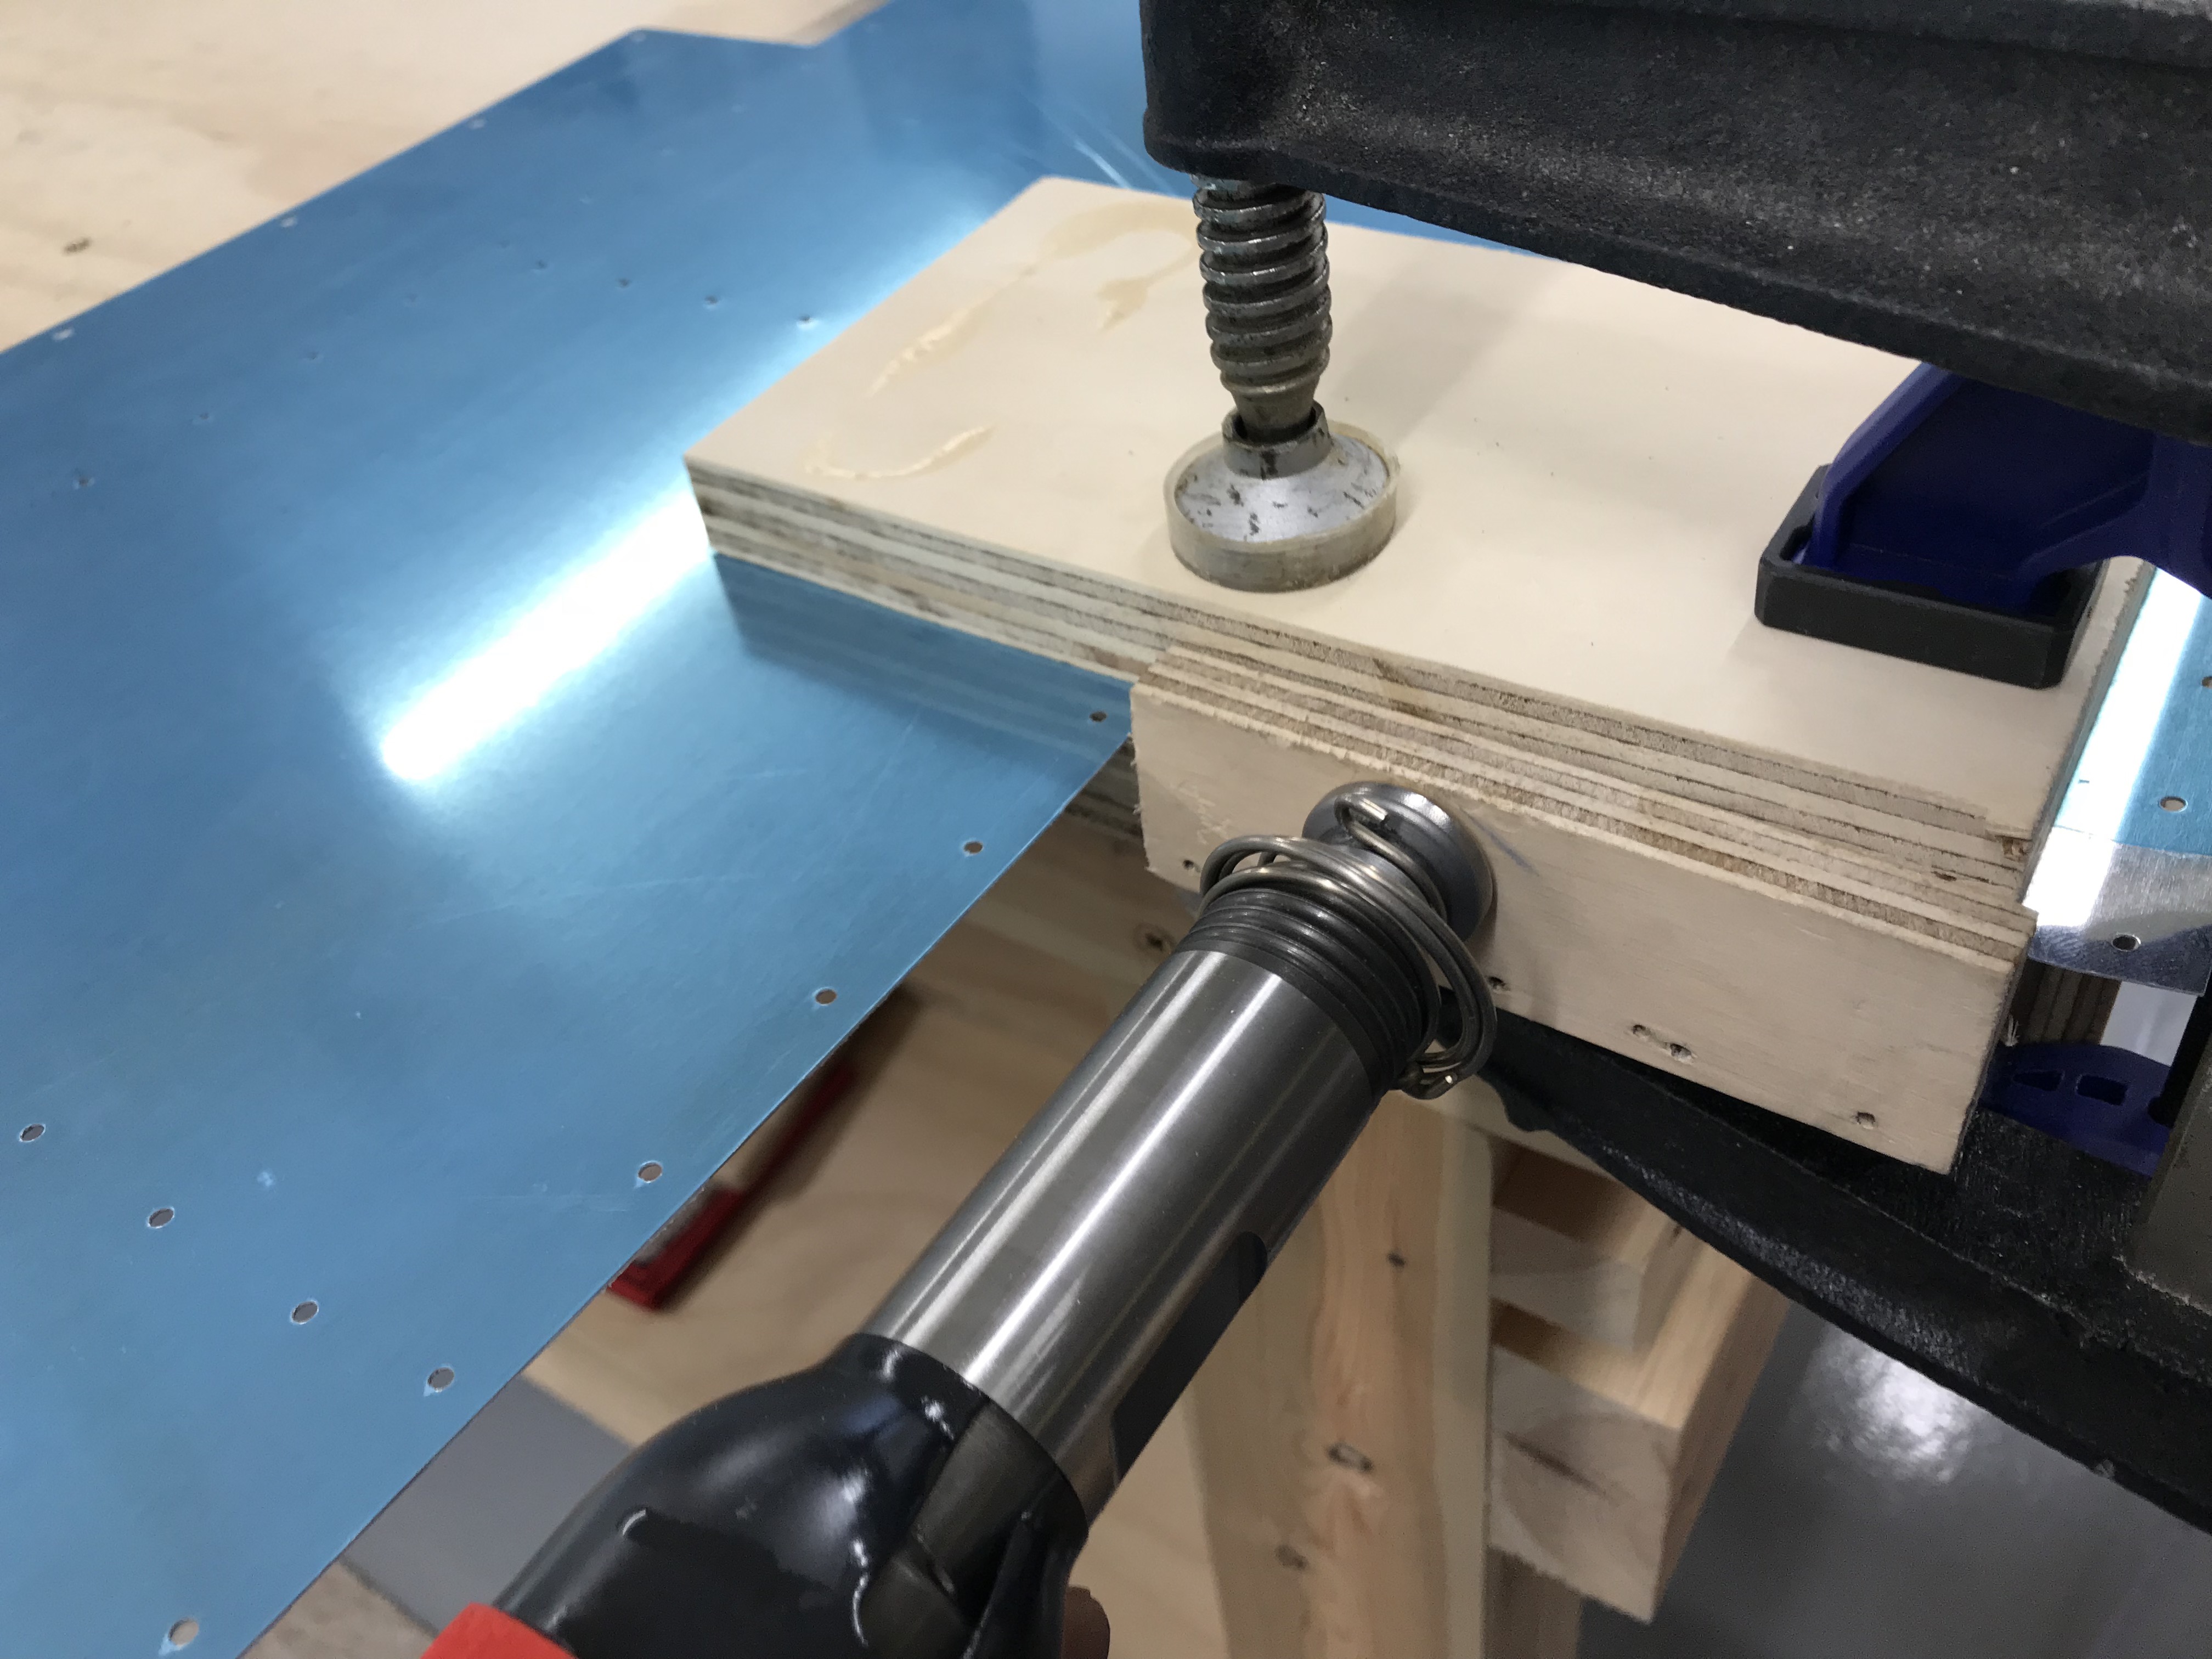
Finished off by using the rivet gun on a low pressure setting to gently tap the bend, and all seemed to work well. Of course I won’t really know until it’s time to fit the skins together … fingers crossed I’ve got the bends in the correct place.
Deburring … lots of it!

I decided to press ahead and deburr all the parts ready for assembly. Then nasty burrs won’t scratch skins etc. Started with the skins, removing the inside vinyl with a piece of dowel … I find this safest on the thin skins, rolling it off prevents bends! I debur the skin edges by first gently removing the saw teeth left by the pressing process. Used the vixen file for this. Then a sanding block with 600 grit emery paper. The pressing process tends to leave a little burr along one side of skin edges as the piece is pressed out, and a gentle run along this with the Cleaveland Debur Tool removes this well. Finished off with the sanding block.
Rear Spars

Next the rear spars, having cut one to length as per the manual. Vixen file for the jagged saw teeth, then Medium Scotchbrite Wheel to finish the edges. Ends finished with the Light Scotchbrite Wheel.
Front Spars

Vixen file again, followed by the Wheels.
Lightening Holes

Used the 1″ Scotchbrite Wheel in the Die Grinder to debur the hole edges.
Skins

Tim came along today, and deburred the skin holes whilst I fabricated the Trim Tab control horns and pushrod pieces. The holes do not seem to require final drilling, so only need deburring on the side that is pressed out (this process leaves a small burr). The other side of the holes are already smooth.
Pieces ready!
Here are all the pieces of the elevator deburred ready for trial assembly and final drilling etc. Note the PVC Foam ribs, which I cut out using the bandsaw. Final trimming done on the sanding machine. The blocks of foam which Vans supplied were only JUST big enough … careful positioning of the templates required! Off to work for a few days, so will be ready to start assembly of parts when I get back. Hoping this won’t take too long now that all the deburring (apart from any holes which will be final drilled) is all done.


One comment on Elevators 09-03 to 09-04 and a bit of 09-12!
You are catching up Steve! Looks good.