


18-07 Sender Float Wire
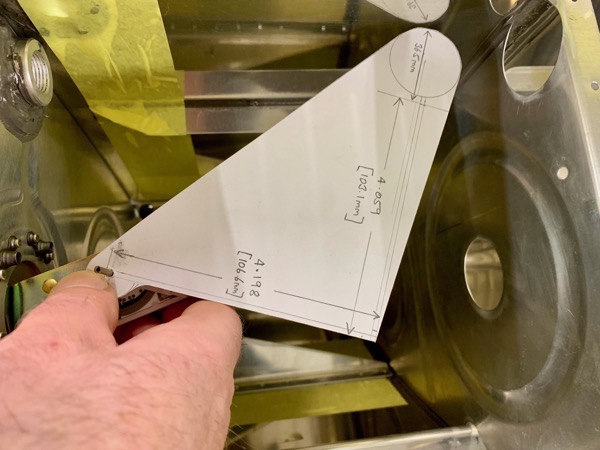
Having read on the Vans Forum that the float wire sizes in the manual on page 18-10 may not be correct, I made a card template and did a trial fit.
As you can see from the picture above, the float just touches the opposite rib face. I suspect you could probably solve this with some clever bends, but I decided to try a another template.
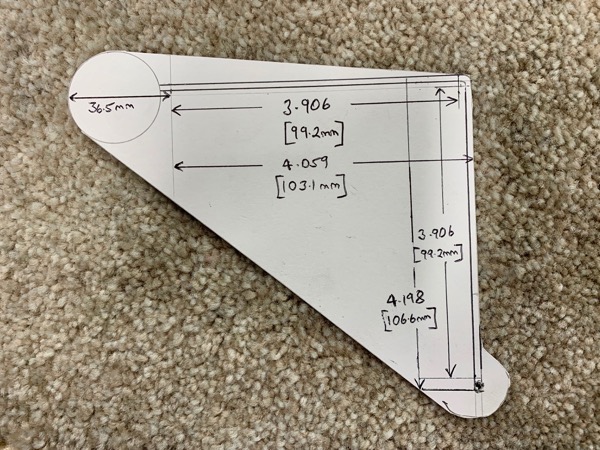
With each 4″ leg 3/32″ shorter than advised by Vans in the manual template, it seemed to solve the problem.

Here is the shortened float wire template, showing adequate clearance from the rib.
Lining the templates up with the sender swing arm seemed to show full scale deflections just about right.

So I went ahead and bent the sender wires as per the shorter template. They fit just fine, but when I get back from work I’ll fine tune them so that the stipulated 1/16″ top & bottom clearance is as accurate as possible.
It’s not obvious from the manual, but both L & R wires are bent exactly the same. In the Right Tank the float points rearwards, opposite to the Left Tank. When fitted you can see that if the Right Float pointed forwards as well it would touch the vent tube. There is just a bit more clearance in the left tank due to the sender geometry.
The other point worth noting is that there is a Left & Right sender, which have to go in the correct tank. No real issue, since if you try to fit them in the incorrect tank, it’s obviously wrong. This is because you can’t orientate the float arm correctly when lining up then screw holes. I guess that’s why Vans don’t mention anything about this in the manual.


