


43 – Sender Mount & 51 – Firewall Penetration
Sender Mount
I am using the Aircraft Speciality hoses for all the engine connections, and they have produced a new routing for the PMAG configurations for those builders utilizing the Garmin avionics package with single or dual PMAGS.
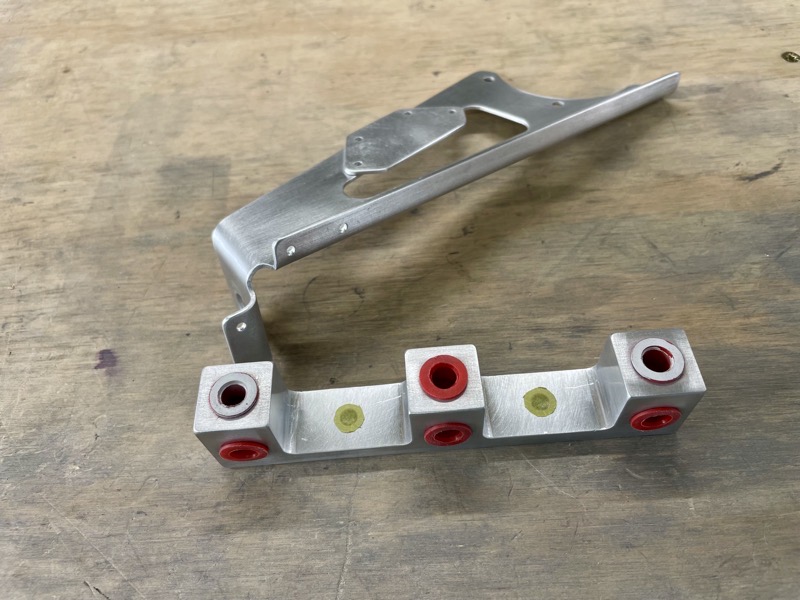
This uses a third block on the VA-168 Sender Mount for the Manifold Pressure Sender, rather than the bracket on the right upper firewall.
Unfortunately, before I had spotted this improvement, I had already followed the Vans manual suggestion and trimmed off one of the blocks on the Sender Mount. But the Aircraft Speciality modification looks much better all round, so I ordered the pipes, and Vans excelled themselves by shipping another mount to me within a few days.
I masked off small areas around the bolt holes ready for Prosealing the firewall holes.
The other parts in the picture are the Governor Bracket components, ready for priming/painting with the Sender Mount.
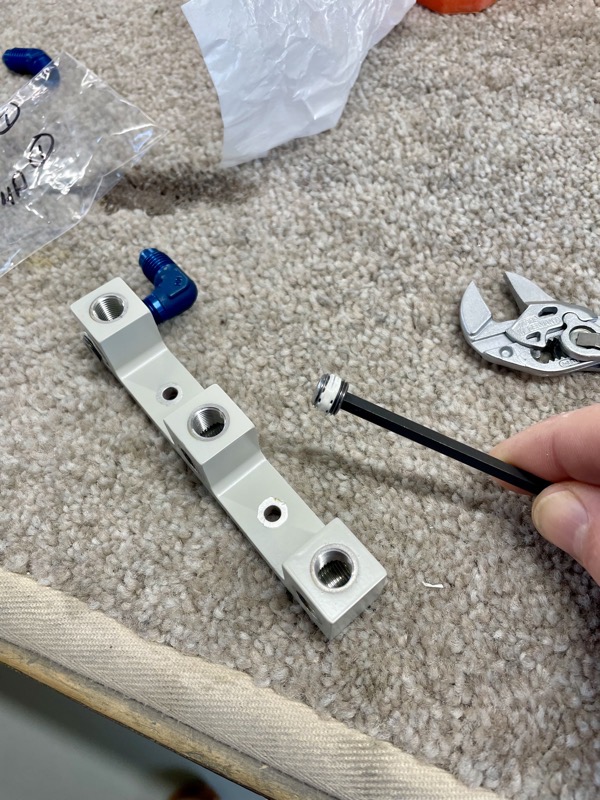
I fitted the pipe fittings prior to installation, adding Loctite 567 to the tapered NPT threads.
I found clocking the angled fittings a challenge. The problem is that the fittings have to be tight, but too tight will cause damage etc. In this case from finger tight, I could not risk a full turn without damage! Anyway, I found that by screwing in/out a couple of times, and re-cleaning the threads, I could achieve the desired angle without shearing off the fitting : )
The Vans manual in section 5 suggests that 1.5 to 2 turns is normal after finger tight, but there was no way I could achieve this. But they also say …
“This is a general guideline… you must still use judgment to not over tighten and damage the threads, but a properly installed fitting is quite tight.”
I guess we’ll find out if I’ve done it right when the fuel/oil pressure gets applied!
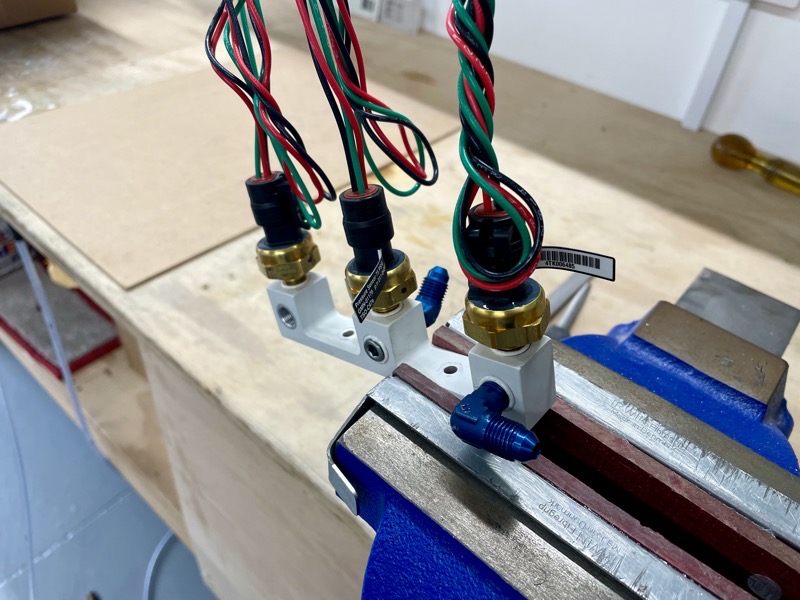
I used the vice to anchor the block when nipping the Garmin Senders.

I applied Proseal around the attachment holes on the firewall to seal them.

Left to right: Oil Pressure, Fuel Pressure and Manifold Pressure.
I reckon this is a much neater installation position for the MAP sender.

The manual specifies a straight connection for the VA-102 Fuel Pressure hose, but I’ve used a 45º connector to help keep the hose clear of the PPS minimising bends.
FF-00009A Governor Bracket
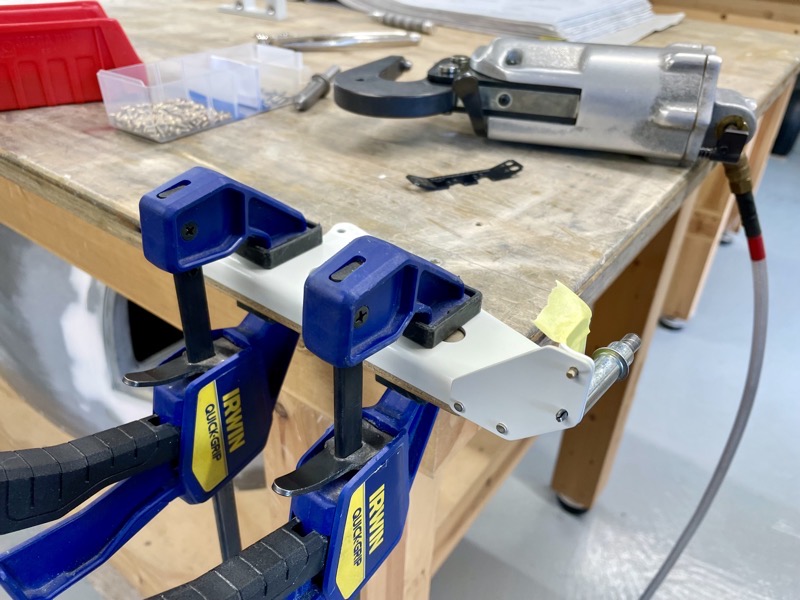
Riveting the FF-00009B Governor Bracket Plate to the bracket.
We are fitting a MT 3 Blade propeller, so are obviously also fitting a MT Governor, and are hoping the bracket geometry will be OK.
Fire Sleeve

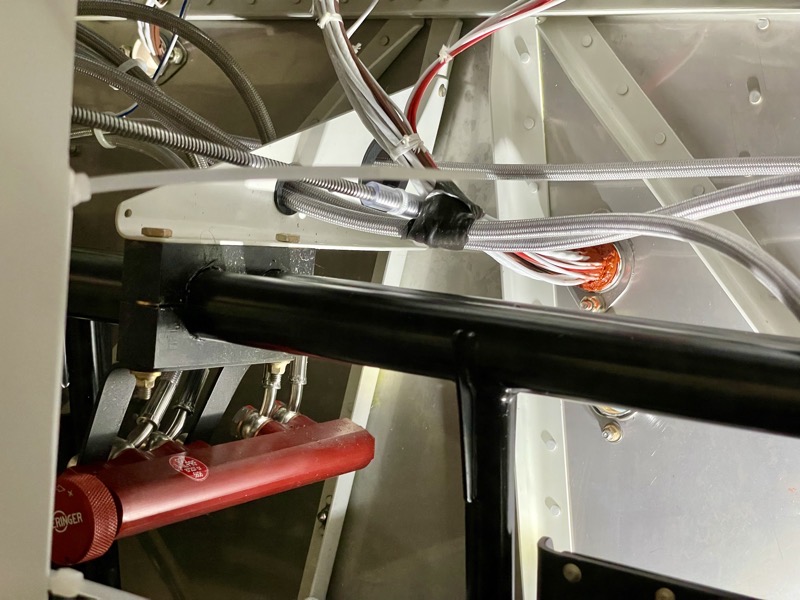
The control cable routing for the EXP119 installation differs from the standard engine. The right FF-00001 Firewall Penetration Fitting is only used for the Cooling Flap cable, leaving the rest of the fitting available for wiring.
The manual leaves sealing up the fittings until after the rest of the engine installation, so you can be sure of cable requirements I guess?
But the routing for the Cooling Flap cable is obvious, and having decided on which fittings for the numerous wires, I decided to secure the wire and cable bundle in this fitting before installing the engine, for easier access.
A fellow RV14 builder here in the UK had recommended this, and I can see why!
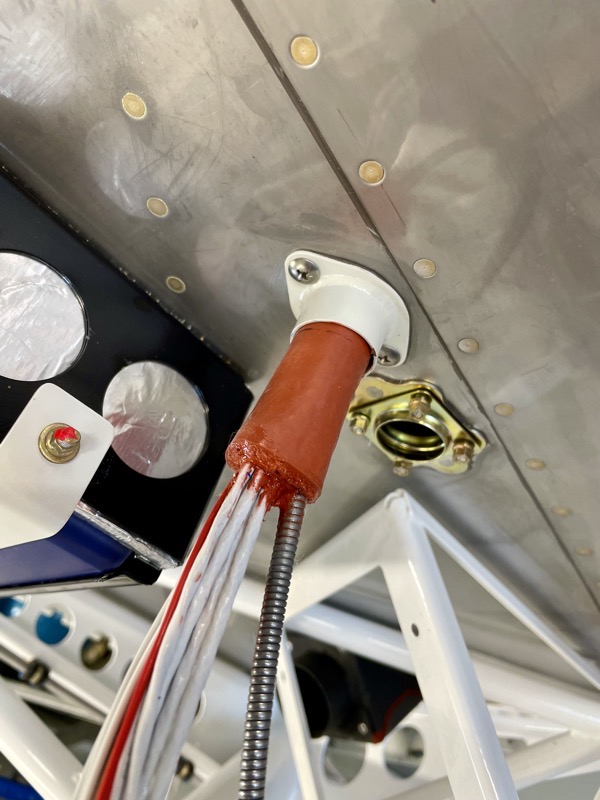
I measured and marked the cables beforehand to place the sealant in the most effective place.
I used J-B Weld Hi-Temp Red RTV Silicone.
Applying the RTV to the aft side involved the head down the rudder pedal routine … groan.
I’m not sure if I misunderstood how to cut the Fire Sleeve, but didn’t seem to have enough to fit around the inner layer … so we ended up sourcing extra Fire Sleeve to get the job done.
Anyway, it was much easier to do before the engine is installed. The left FF-00001 Firewall Penetration Fitting will be easier to reach with the engine installed, so I decided to leave this until later, when sure of the cable routing forward of this fitting.


One comment on 43 – Sender Mount & 51 – Firewall Penetration
Your blog is amazing. Best RV-14 blog. I definitely owe you a gift when i finish my project. Could you tell me what wires you routed through the right firewall penetration. I just want to make sure that I do the same as I want to seal it prior to engine installation