Elevators 09-24 … Holy Molex!
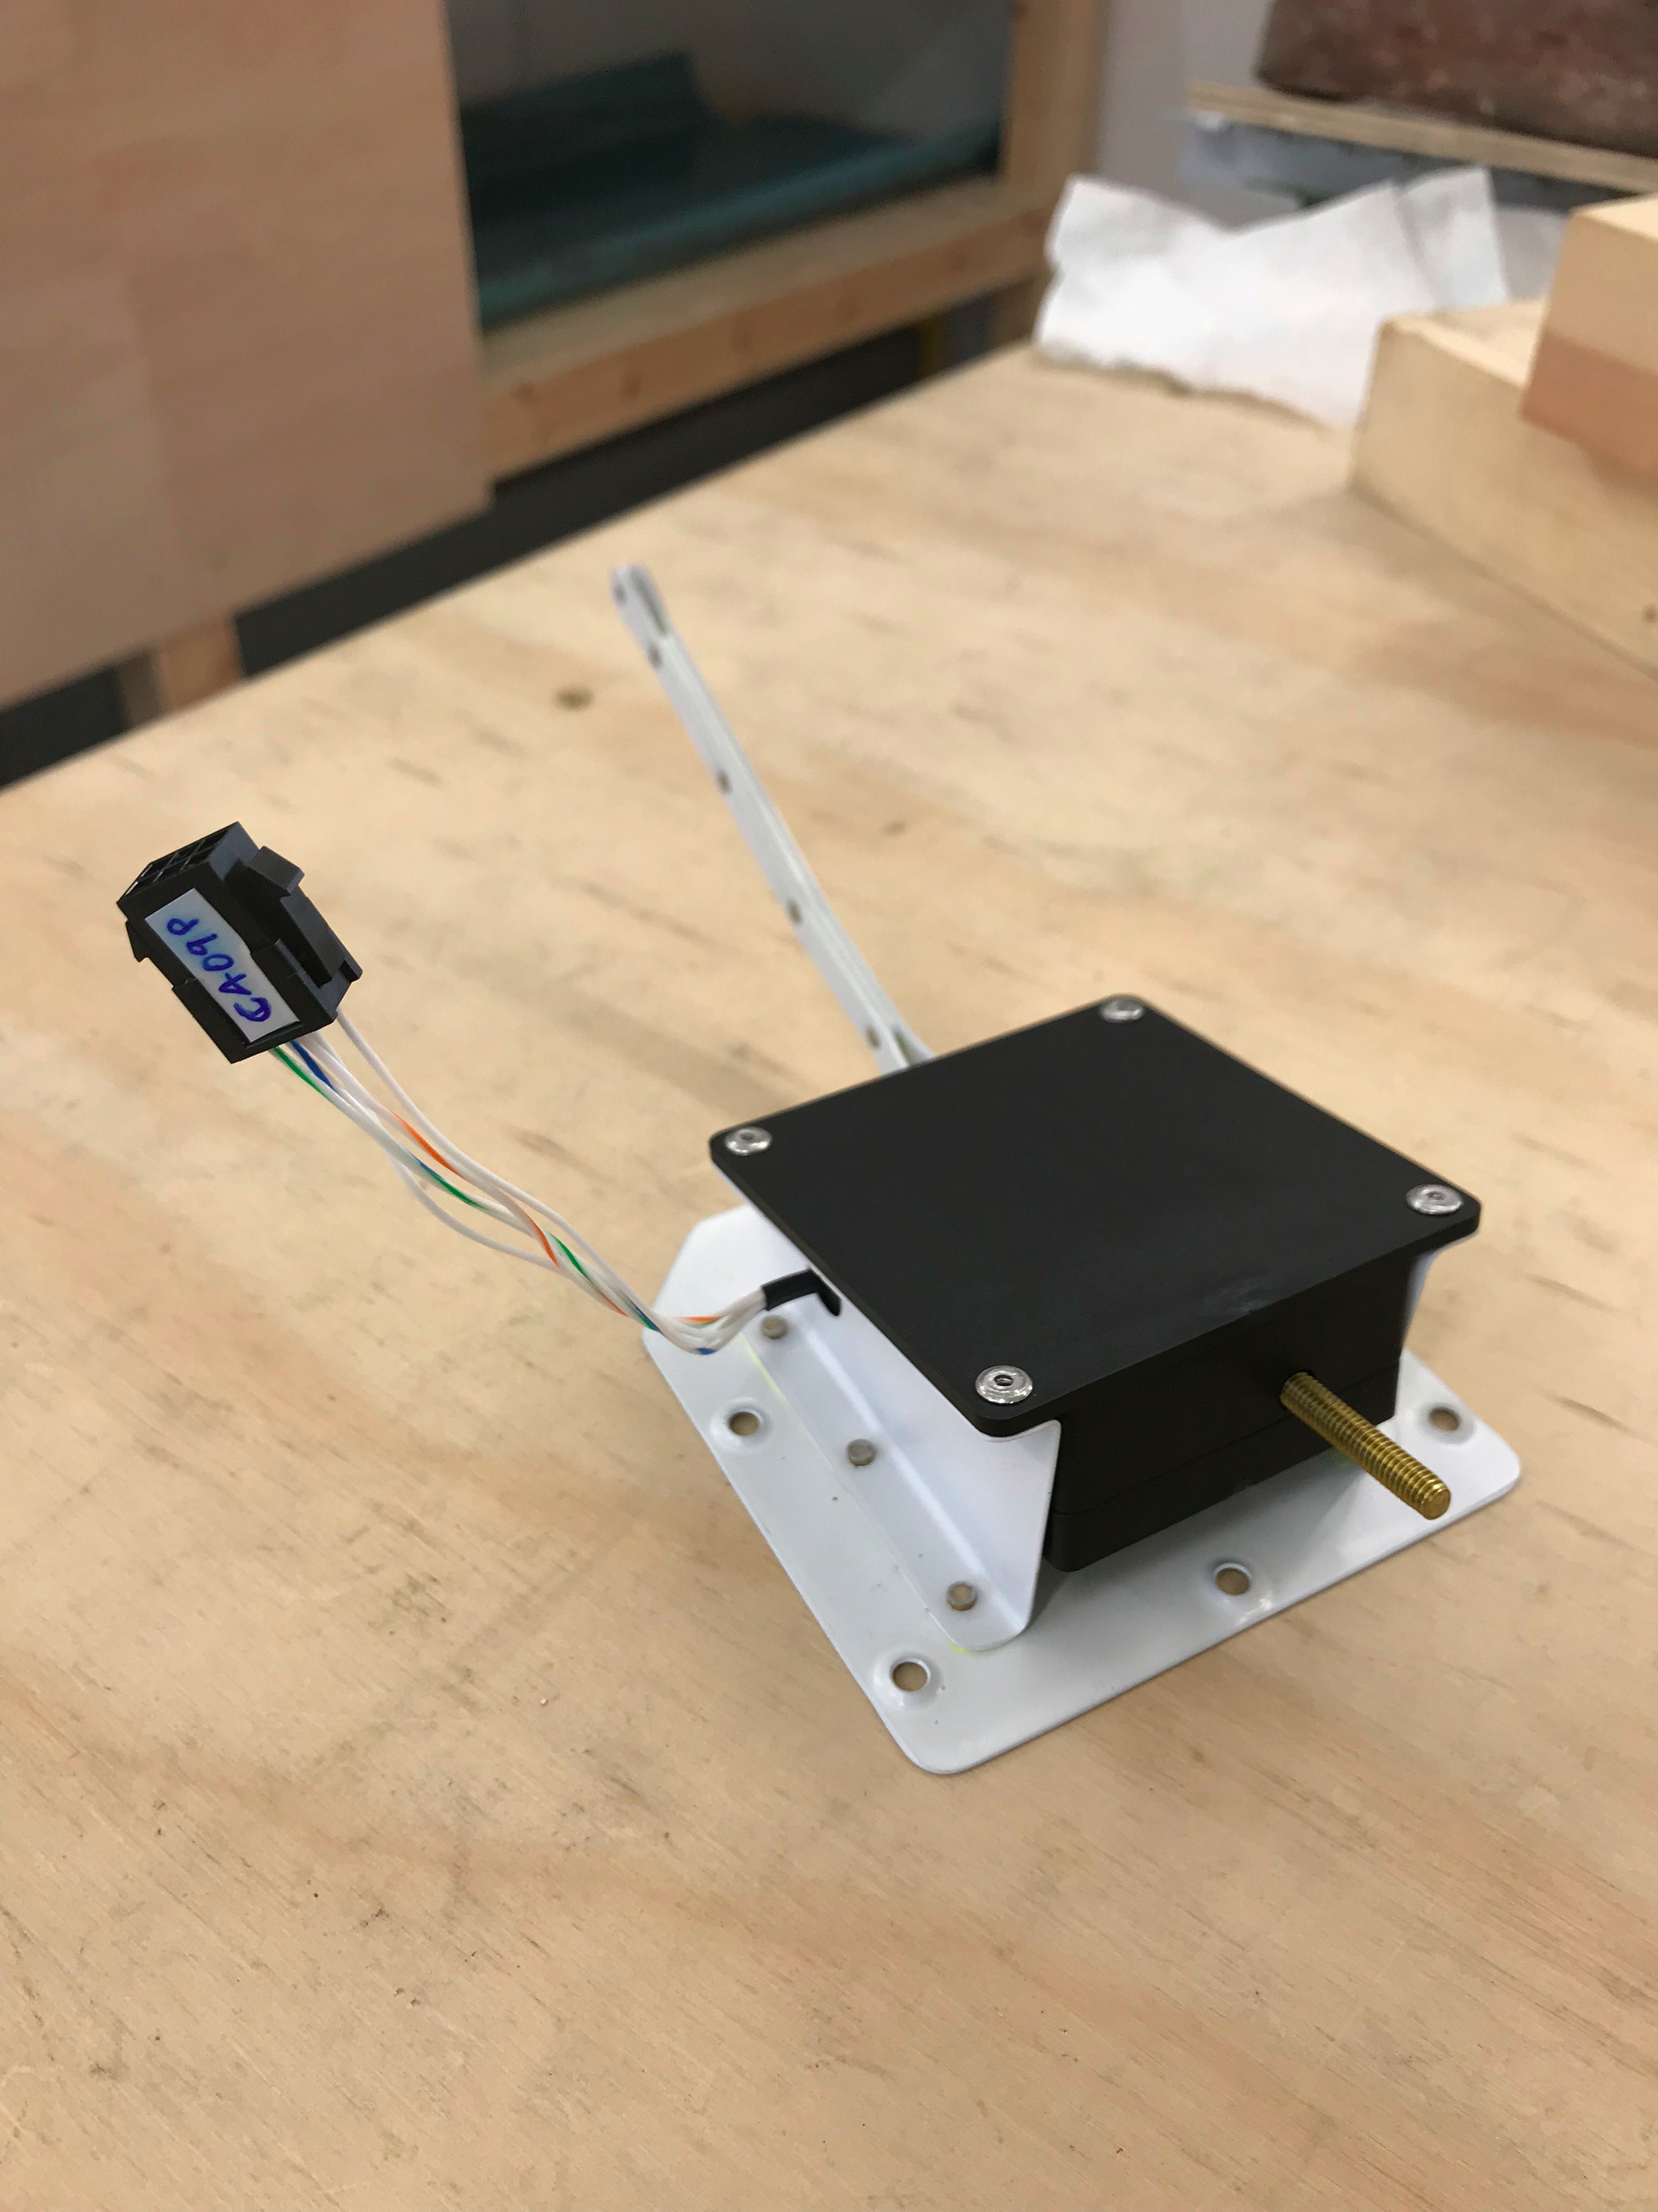
Whilst waiting for the foam ribs to bond for a few days, plenty of time to install the the trim tab servo. Riveting up the servo holder didn’t take that long.

More sticky stuff, Silicone this time, on the lead.
Molex
I’ve never worked with such small connectors … Micro Molex … so some research online was required. Great info from AeroElectric, and some videos on YouTube.
Tools

After some advice from a fellow RV14 builder I bought these crimps from Farnell …

… and also these wire strippers which can handle 26 AWG. I expect I’ll be needing these items a lot during the project.
Male Molex Micro-Fit 3.0 Series
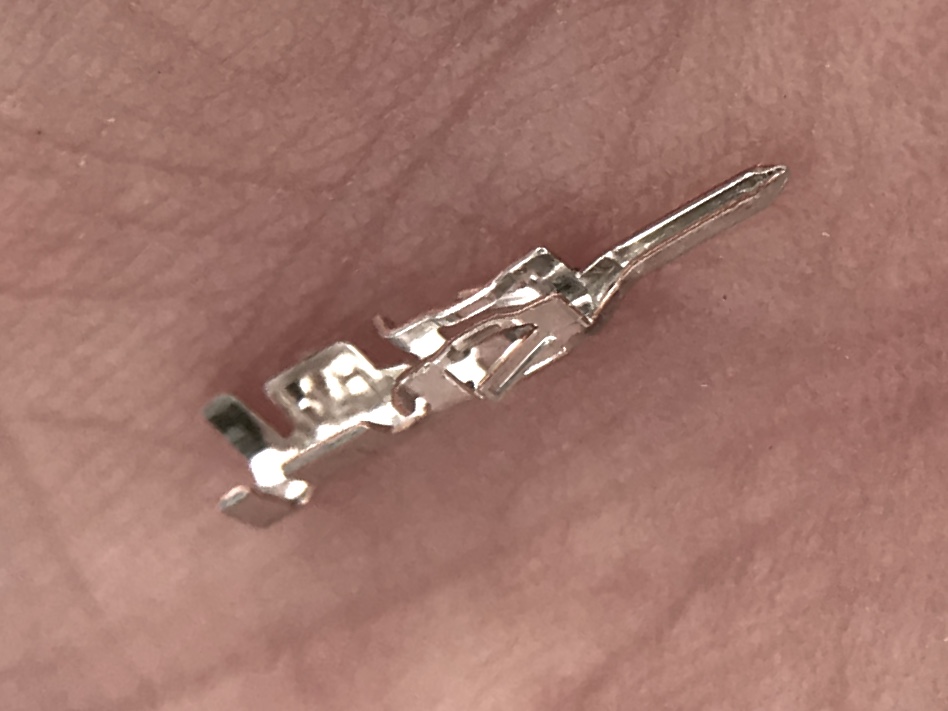
Here is one of the little blighters! I ordered some more from RS even though the min order is 100! Got through quite a few practising, and they are only about 4p each. Not sure but probably will need some more anyway later on. I found the only way I could see enough to get this job done was to view through a magnifying glass.

First job is to trim the insulator crimp wings just a little bit, they are too long as supplied to make a good job of gripping the 26AWG wire.

Vans suggest that for 26AWG wire it’s best to strip enough back to fold over the conductor, providing more for the crimp to grip. Having tried it without doing this I agree. Everything positioned so that the insulator is inside the left most wings, and the doubled-over conductor is inside the wider wings, but no further.
Now comes the fiddly bit ….

The crimp tool is too thick really … some people grind it thinner, but I found that if you are careful to get the little tabs shown by the arrow above firmly against the tool, it just works. The 1.4 on the tool is best for the Micro-Fit conductor crimp.
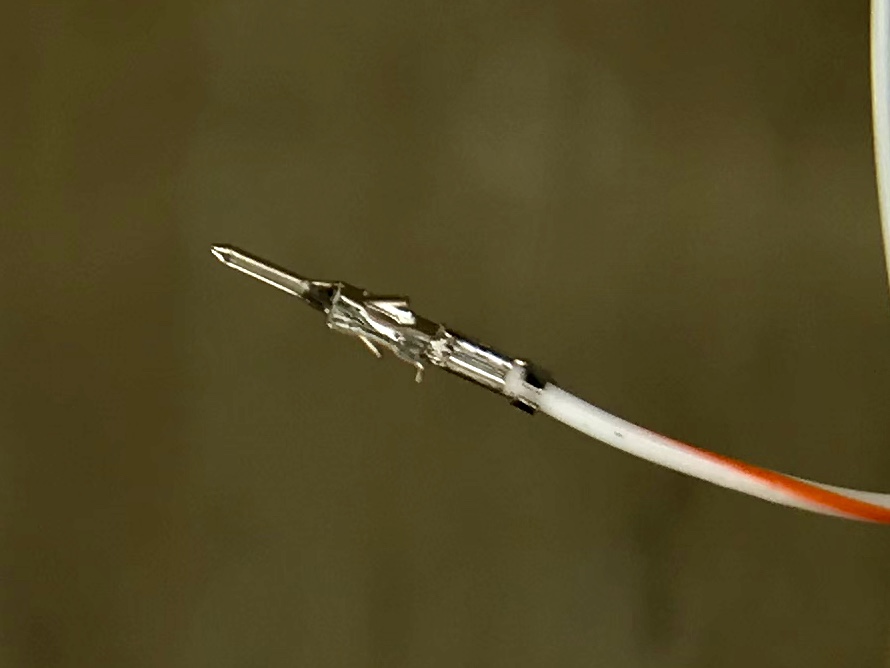
After a good hard squeeze, the crimp is done!
Now the insulator to be crimped, I used position 2.0 for this. Again careful positioning needed to crimp just the insulator wings.
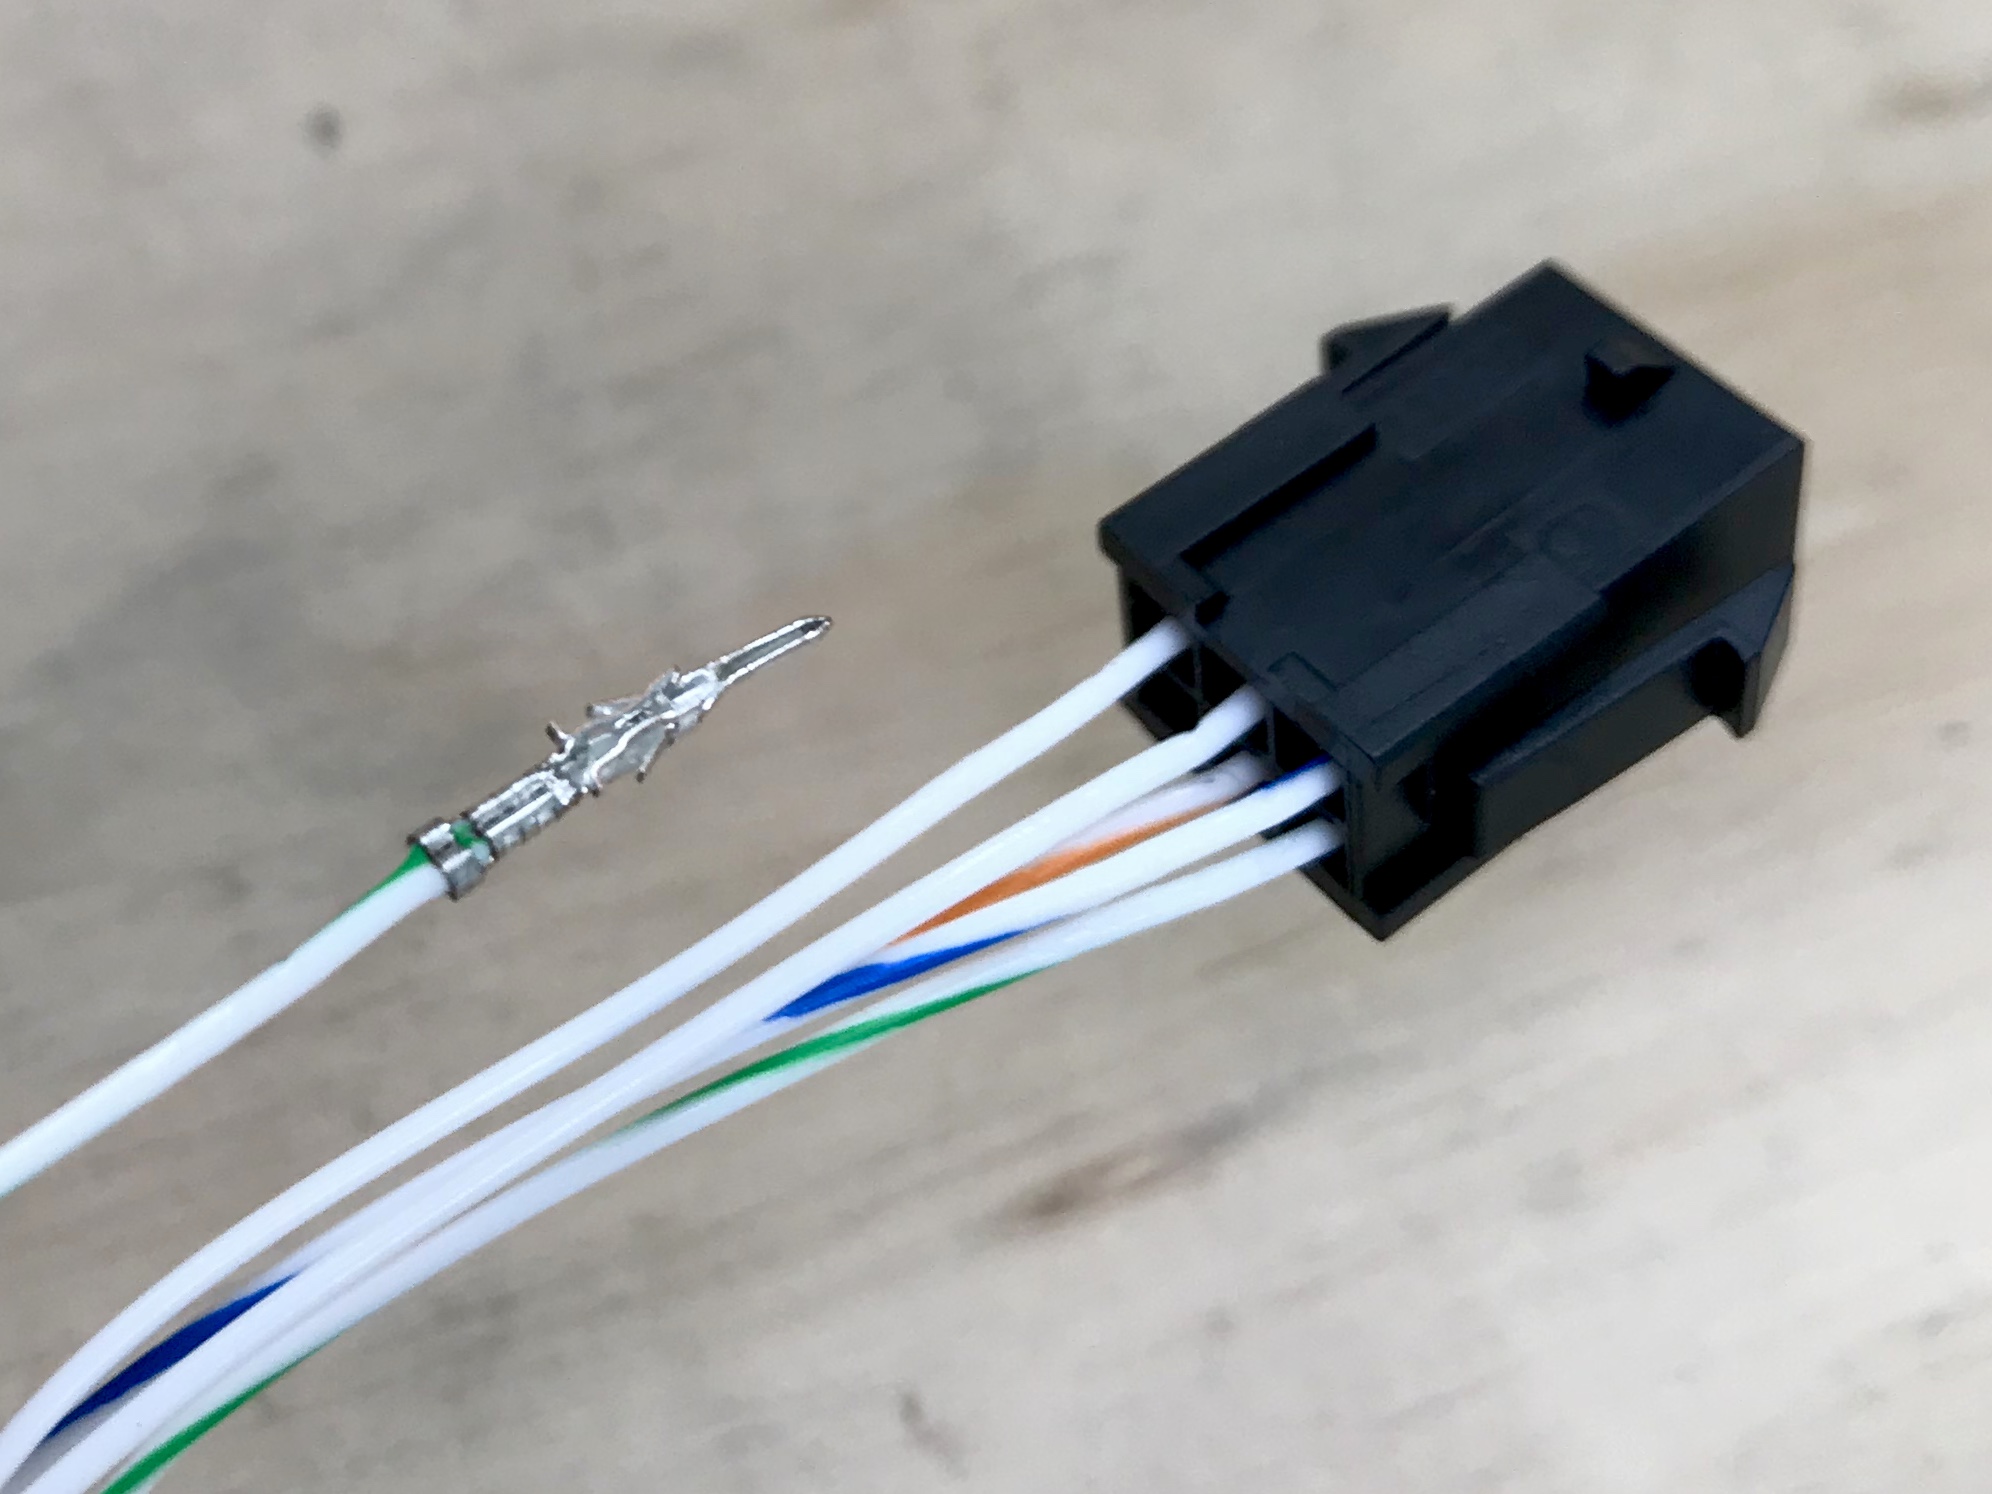
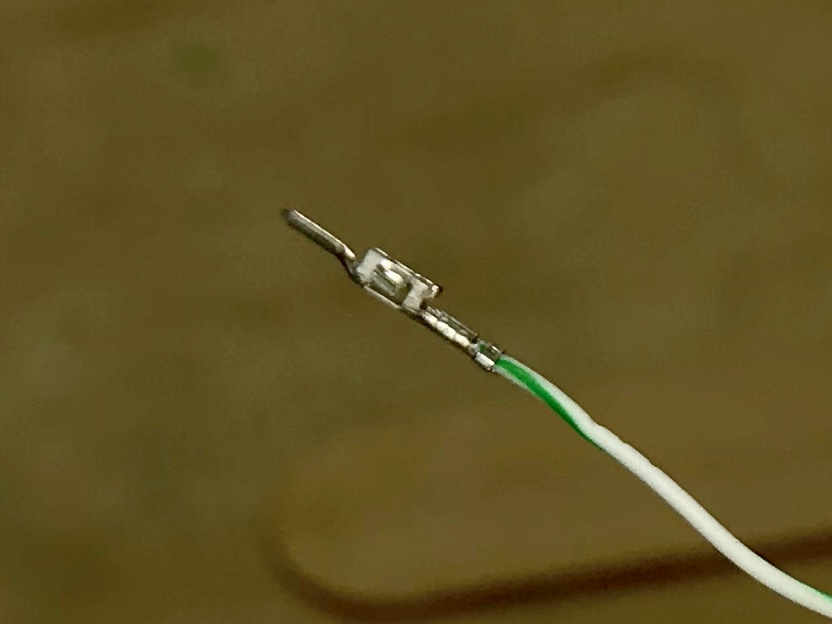
All done ready for insertion in the plug.
As per advice by Vans in the manual, the terminal only engages when orientated as above.
Servo
Plug attached to the servo. I had tested the servo with a 9V battery prior to pop riveting it in place, just in case!