38-31 Sanding the Fairing
I hadn’t been looking forward at all to this job … but actually, it wasn’t too bad.
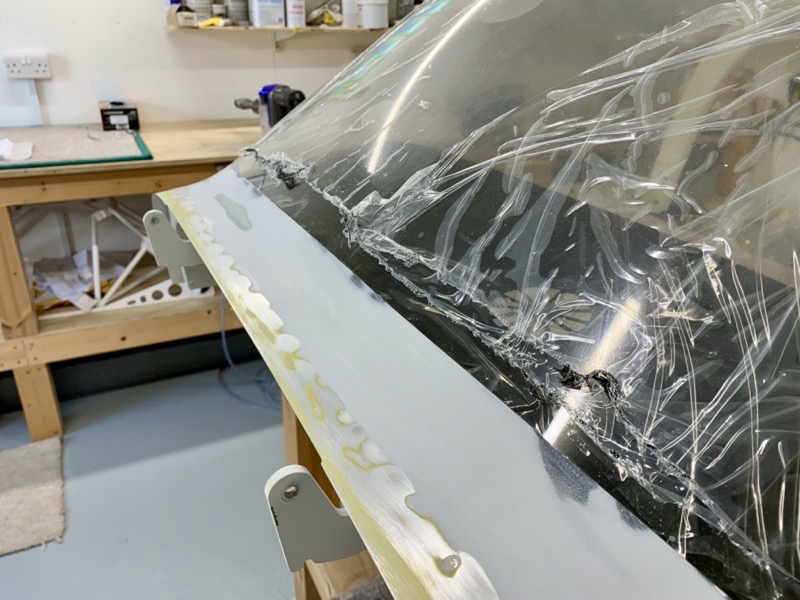
First job was to remove the peel ply, which came off easily. Happily the resin had not soaked up onto the aft tape.

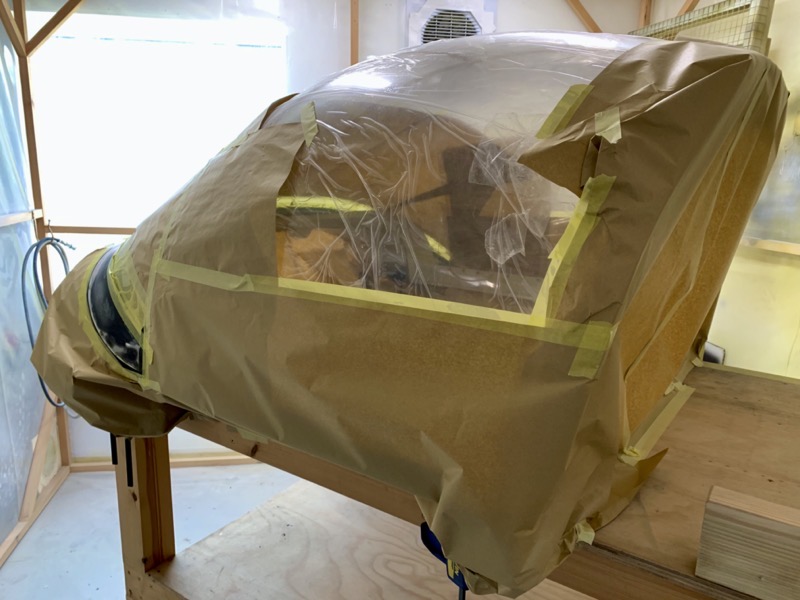
I had heard from others that the sanding makes lots of dust, and that it settles all over the workshop. So I decided to take the canopy off the fuselage, and I managed to get it inside my spray booth clamped to one of my benches.
But in hindsight, as long as you hoover up the dust occasionally, it didn’t get out of hand.
Sanding Blocks
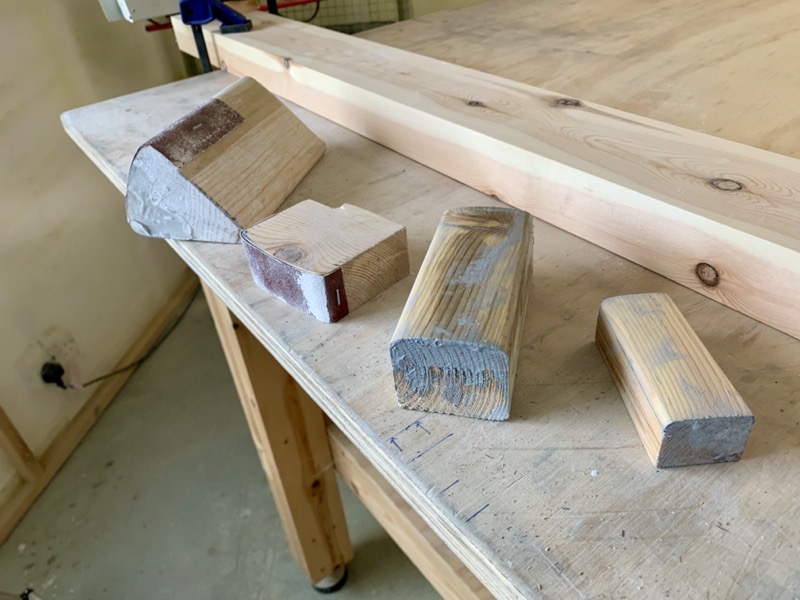
I started by using the block suggested by Vans, which was OK but I found it hard to grip due to its shape.
So I ended up making another one with a 4″ radius, but in a more conventional shape, and that worked better for me.
I also made a smaller one with an intermediate curve to help with the transition area.
Also in the transition area from curved to flat you need to be able to angle the block so the curve flattens … much easier with a smaller length block. Of course it’s important to have a block at least as long as the one specified by Vans for the central curve, so that the profile remains flat across the span.
I used a good quality 60 grit resin backed sandpaper stapled to the blocks.
Sanding, sanding, sanding!

This is the block I ended up using most of the time.
I made it slightly smaller in width than the Vans block … I was paranoid about not scuffing the aft tape too deeply and going through to the plexiglass, and discovered this block made it easier to control this aspect.
In the transition area I also used this block, and the Vans suggestion of angling the block seemed to work well. But in the end, it’s a slow process and needing frequent assessment by feeling with your hand.
I used a smaller block with curved edges to feather the profile down to the level of the aft tape. I tried to use 120 grit as suggested in the Vans videos, but it just wouldn’t cut fast enough … so I used 80 grit going very carefully.
After the sanding the profile came out pretty well without any major filling …
… I needed to add a bit to the front to make the feathered edge better, and the odd spot along the aft edge where the resin hadn’t completely filled the weave.
I used a car body filler for this, purchased from my paint supplier, similar to Isopon P38.

This is a view of one side, showing that to achieve the correct contour I ended up exposing some metal in places. Around the aft section of the fairing I don’t see how this wouldn’t happen?

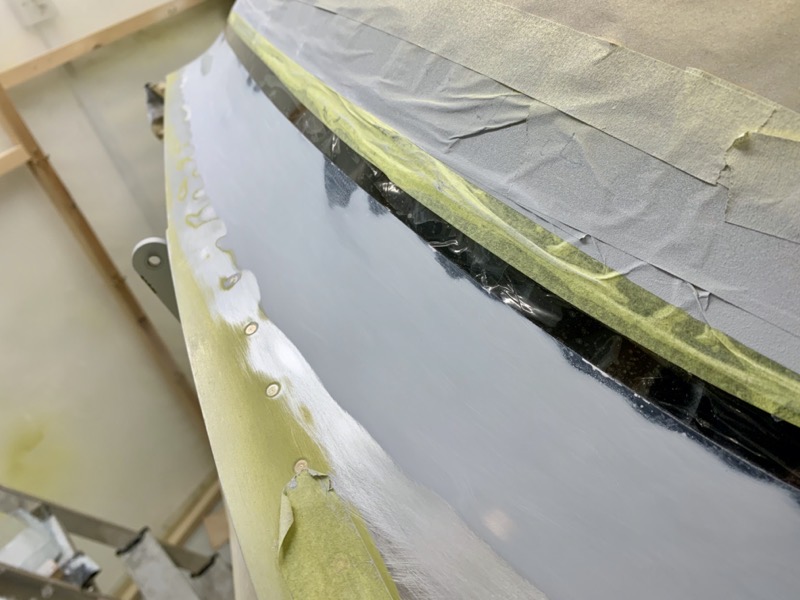
In the point of the triangle where the canopy meets the canopy rail ensure the tape is sealing well … when I later removed the aft tape I discovered mine had a small bleed of resin here. Luckily since the plexi wasn’t scuffed in this area I was able to flick it off easily since it had not adhered. But best avoided!
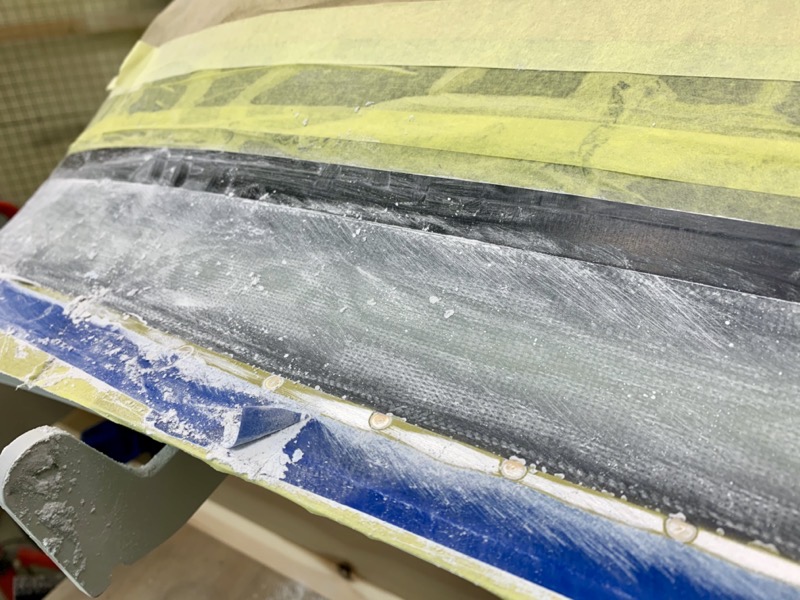
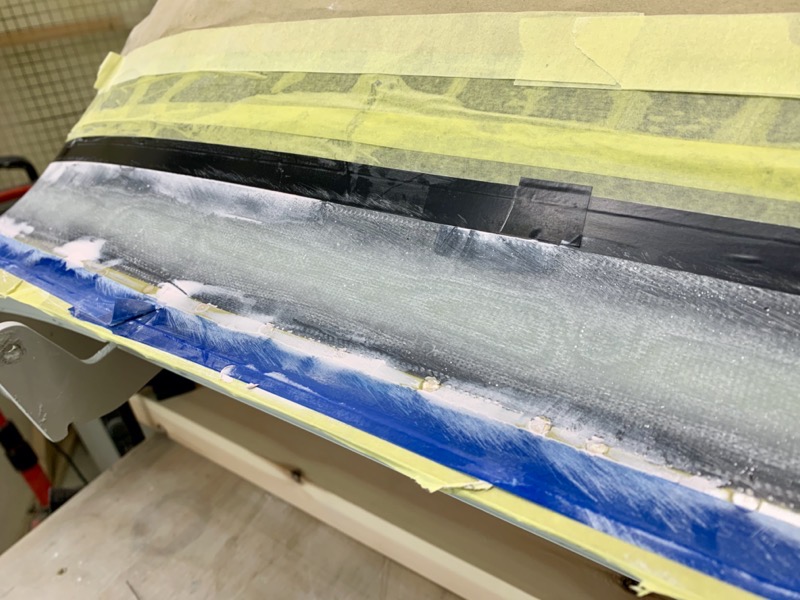
Final Resin Coat

The manual and videos are a bit vague about when to remove the aft top layer of tape.
Anyway, I did it at the same time as Step 8 on page 38-31, when the forward tape is removed to form the feathered edge.
Then prior to coating with the final layer of resin I gently reduced the rear edge level down to the single layer of tape – GULP! Don’t go through onto the plexiglass … I used a small block again to finely control this stage.

After removing the sacrificial masking tape covering the black PVC tape, I used the large blocks to sand the resin surface, and the smaller ones to achieve the feather edge at the front and again lower the resin down to the aft tape level.
Filler Primer
The final stage is a coat of filler primer to fill pinholes and fine tune any imperfections.
I’d never sprayed this stuff before, so masked off everything just in case it went everywhere!

I had bought a larger needle (2mm) for my spraygun, being told that size would be fine to spray this primer … well it wasn’t big enough. In hindsight I should have bought a 2.5mm at least, the gun just wouldn’t spray this treacle consistency primer. In the end I had to thin it more than I should have just to get it through the gun.
Anyway, eventually I got a reasonable layer on.
Sanding the primer proved very time consuming with dry sandpaper … it clogs up after about two passes!
I didn’t want to use “wet n dry”, but in the end I did … and it made the job much faster and easier.
Although I went through to the resin in lots of places, it still all felt very smooth … and since I’ll be getting a professional sprayer to do the planes exterior, I reckoned he’ll be able to fine tune any imperfections he finds.
So I decided enough was enough!
With baited breath I removed the aft tape line.
All was well, no marks on the plexiglass, and a nice straight line : )
The chap in the Vans video mentions a “Happy Dance” at this stage … so I did one!