


Park Brake – Beringer
I’d fitted the Beringer Park Brake valve ages ago, but hadn’t got round to working out how I was going to control it!
I want to have a means to display on the PFD a caption to indicate the Park Brake is on … for obvious reasons.
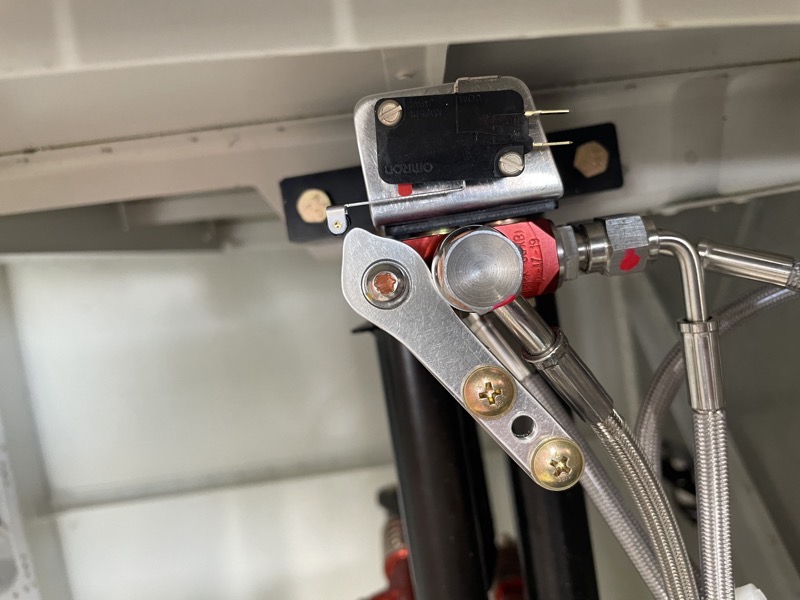
I decided to use the microswitch for the stall warning, supplied by Vans, which I hadn’t needed since I have fitted the Garmin Pitot/AOA.
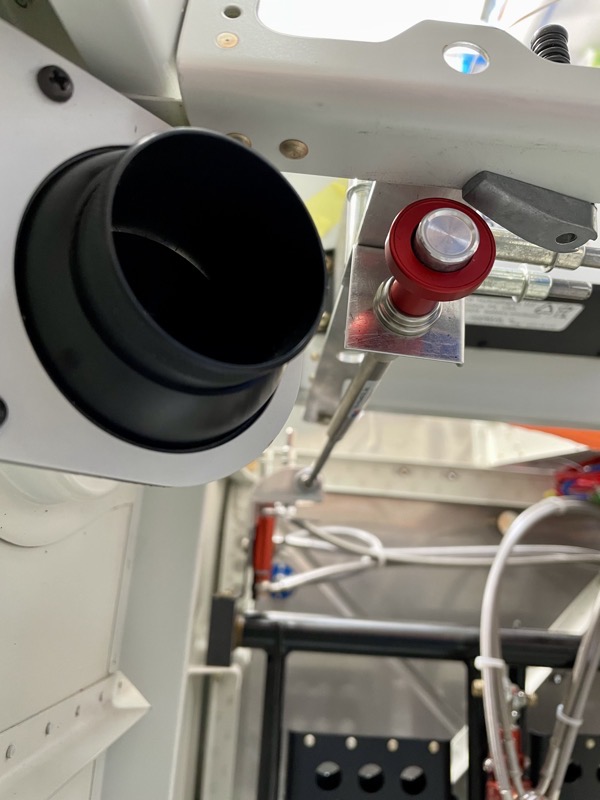
After some head scratching I came up with idea shown on in this picture.
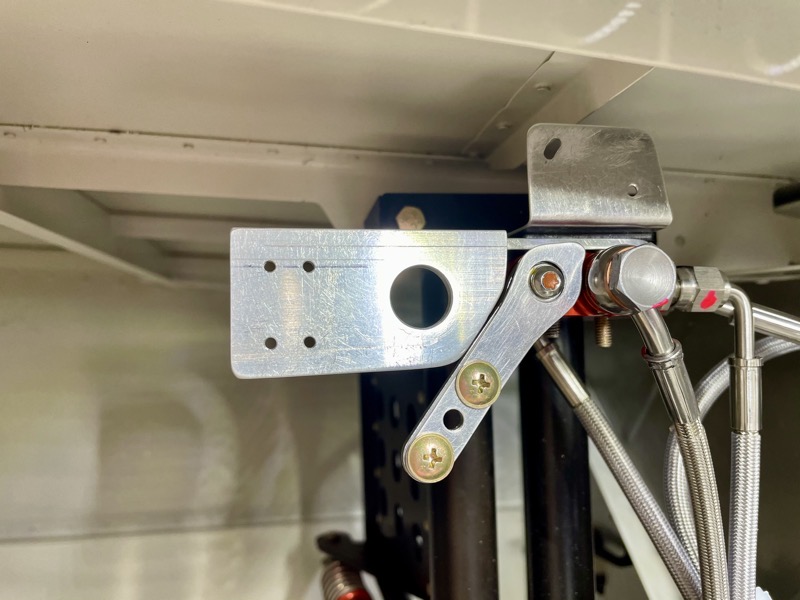
It needed some form of limit stop … so I used some scrap 1/8″ angle. The valve body itself provides the stop at the other travel limit.
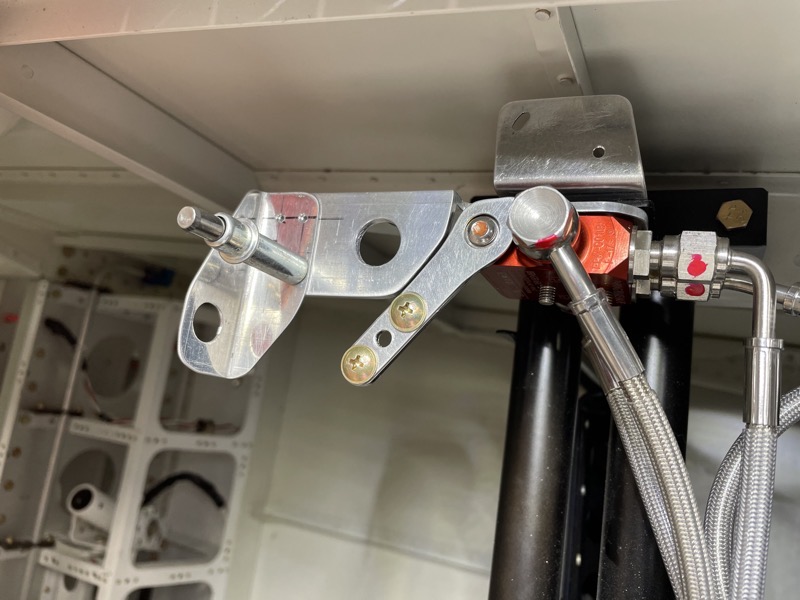
I used the limit stop to mount a cable support.

Here’s the cam closing the microswitch when the park brake is fully off.
I had to contact Beringer to double check the position of the valve for OFF/ON.
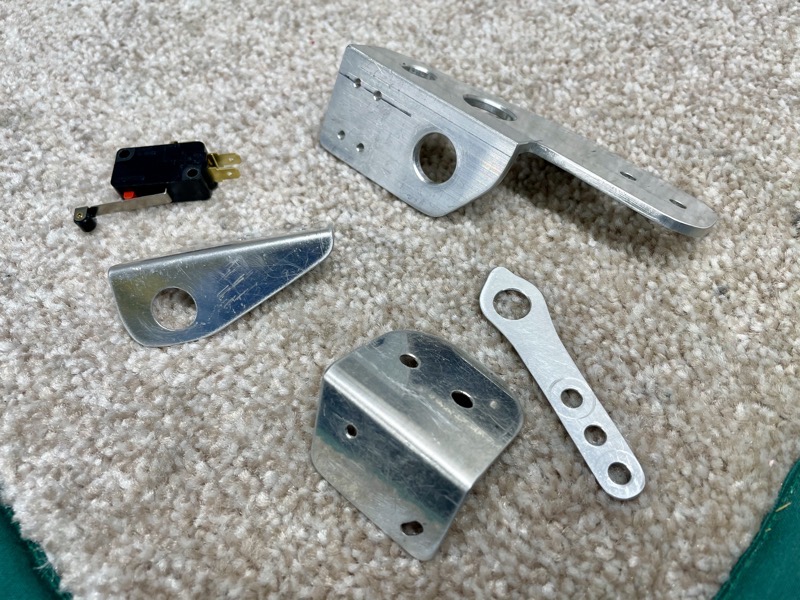
These are the components for the valve side of the control.

I didn’t really want to mount the park brake control knob on the panel itself, so I decided to fit a bracket underneath the panel to provide support for the control knob.
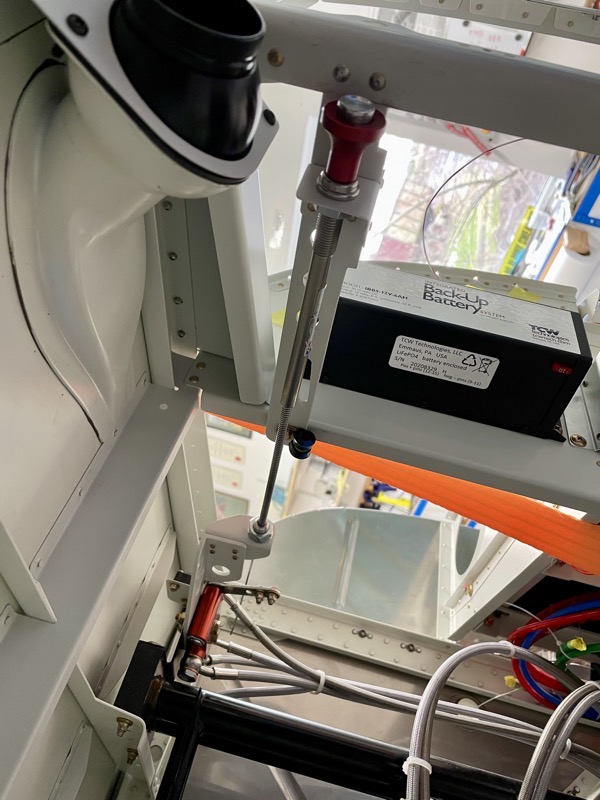
I initially tried a ratchet knob, the A-740, but in the end I used the A-700 with a button to release and lock.
I made the bracket support from my scrap 1/8″ angle, which gave enough torsional rigidity to prevent wobbles!

The A-700 arrives with a disconcerting tag tied to it, which informs you NOT to pull out the knob too far or a little ball bearing will pop out : )
More head scratching! How to cut the cable to size if you can’t remove the inner cable???
Happily an internet search spotted reassuring advice from the cable manufacturer … together with the top tip … do NOT loose the ball bearing!

Once the inner was safely removed I used a Dremel cutting disc to cut the cable to length.

I used a Bowden Cable Clamp as supplied by Aircraft Spruce to anchor the cable end.
Be careful to buy the one which fits the cable diameter, there seem to be two available.

Here are all the components after priming/painting …

… and after riveting.
I cut as many lightening holes as I could get away with : )
The slot in the knob bracket is to allow access for the Cabin Heat cable.
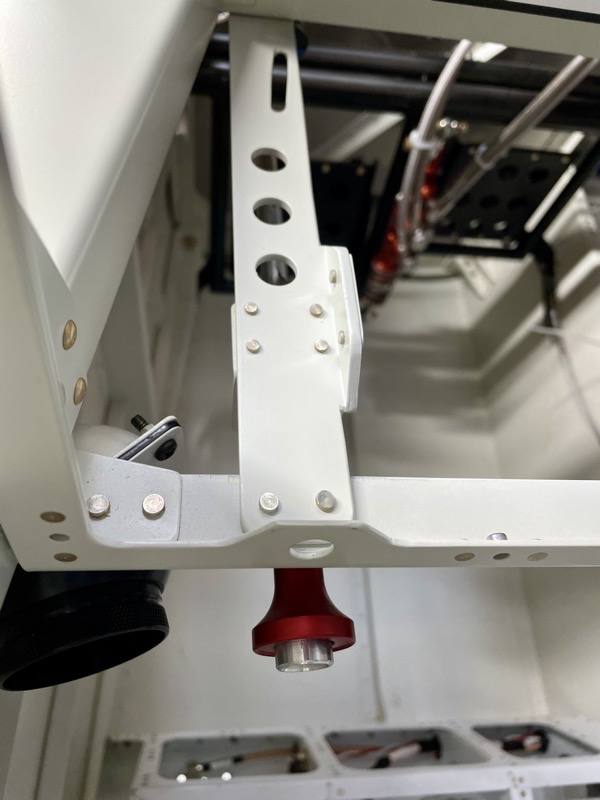
I positioned the bracket so that when the Park Brake is ON the knob sits proud of the panel. This will provide another visual cue that the Park Brake is ON.
When fully OFF it sits forward of the panel face.

I still haven’t found suitable hardware to attach the cable to the lever.
Here is a video showing the microswitch action.


6 comments on Park Brake – Beringer
Very professional Steve. Nice clear photo’s too.
I am currently at this stage & love your solution. What is the thickness of your fabricated mounting bracket? Thanks.
Hi Barry
I used 1/8” thick aluminium angle … it seems robust enough for the job, and provides enough torsional rigidity
This is great! I’m fabricating parts now.
Did you have any issues installing the cabin heat control above the bracket?
Hi Scott, no I didn’t, it all fitted nicely. I included a slot in the bracket to provide a comfortable path for the heater cable. G-STRV has flown 70 hours now, and the bracket works just fine.
Beautiful piece of work!