


45-11 & 12 Fitting Lower Cowling
When fitting the lower cowl, the challenge is working out how to support everything.
The front of the lower cowl can be supported by the clecos on either side of the spinner cutout, and in a rare glimpse of Van’s humour in the manual, they suggest you employ an anti-gravity device for the rear.
My anti-gravity device was a table.
After making sure the alignment was good at the front …

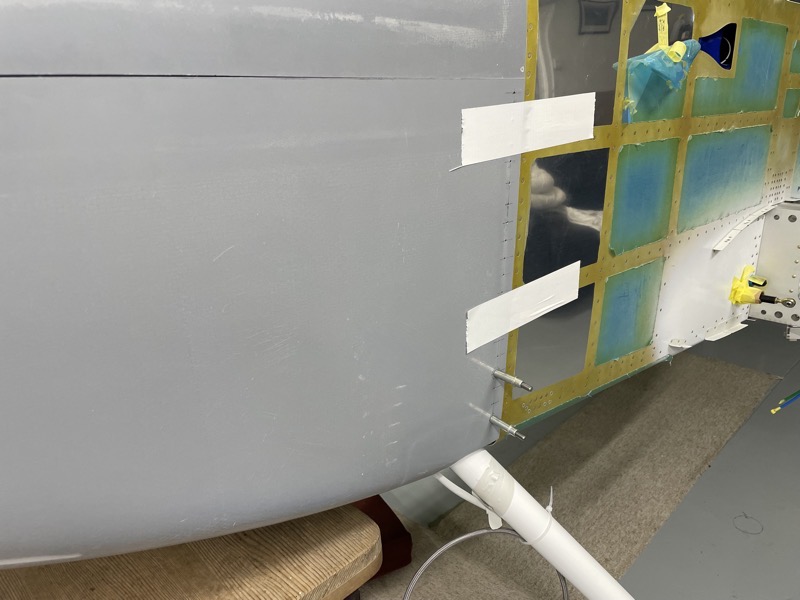
… the aft edge needs to be trimmed to sit flush up to the fuselage skins.
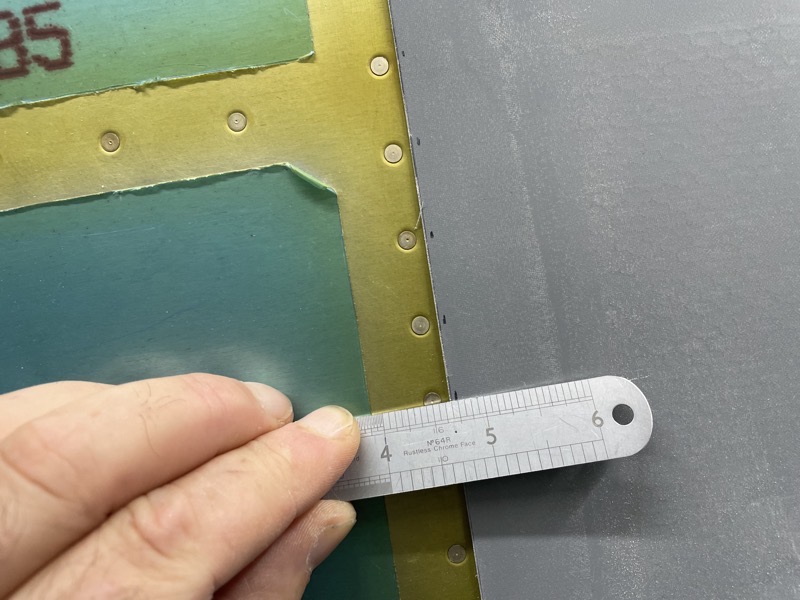
I trimmed off enough to see the line of rivets, and having measured the distance from their centres to the skin edge, marked the aft edge for the next trim.

An important measurement! I couldn’t afford to remove too much material!
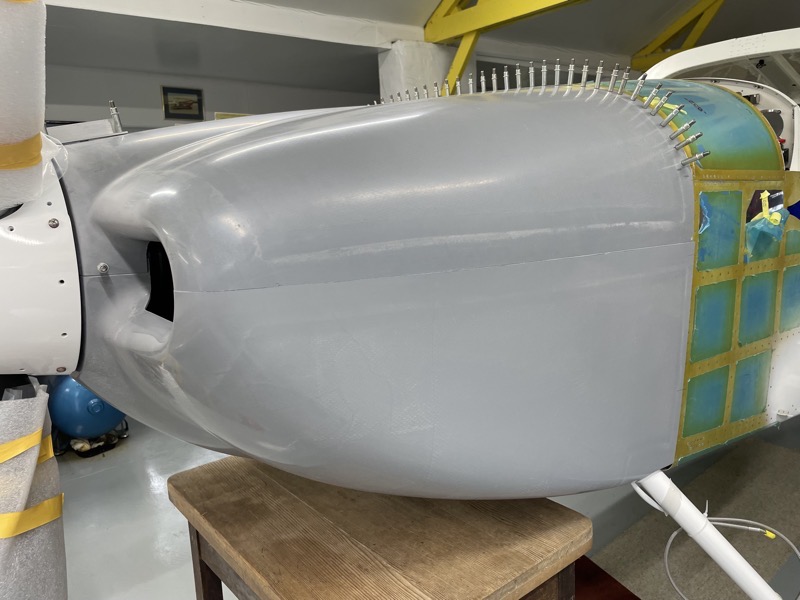
After several trims, taking off small amounts at a time, I ended up with a nice fit.
Actually you only need to achieve a fit with a gap of less than 0.050″ (1.3mm) at this stage, since the final gap adjustment for paint clearance happens right at the end.
But as I found with the upper cowling, a good fit helps to keep things stable and located correctly for the hinge drilling.
Once the aft edge is sitting snuggly and not distorting the cowling any way, the upper edge of the lower cowling is marked along the upper cowling lower edge. Then the lower cowling is carefully trimmed to fit the upper cowling.

Pressing the sides of the cowling along this interface causes a big geometry change, so be sure when marking the trim line you haven’t pressed in too much or you may end up with a bigger gap!

The rivet positions are marked to be adjacent to the skin rivets.
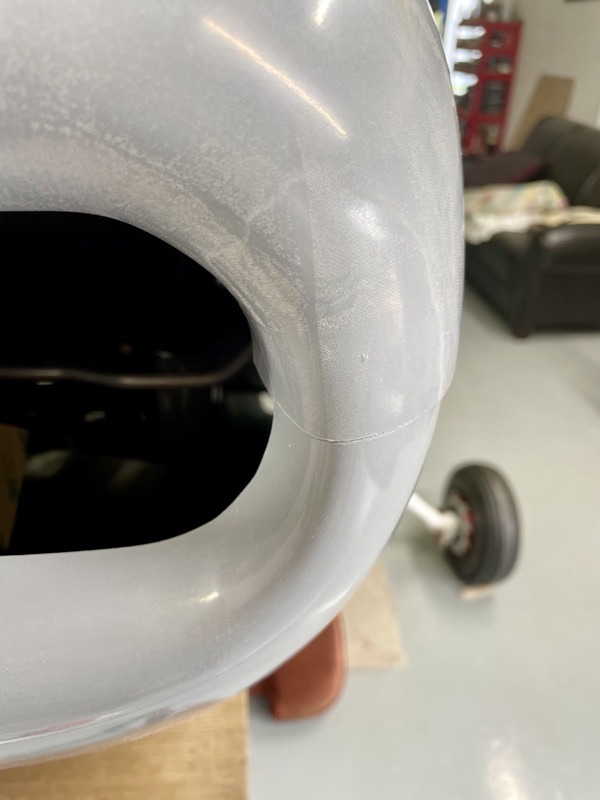
It was at this stage I realised that for some reason the cowl inside reinforcing was going to interfere with the hinge location.
I’m not sure why? I’m hoping it’s because the cowling fabricator just positioned the aft edge of the reinforcing a smidge too far aft.
Or could it be my cowling is positioned too far aft for some reason … such as my MT Propeller spinner aft edge being further aft than the Vans spinner?
From the drawings I’m pretty sure the MT Spinner aft edge is very close to the Vans one, so fingers crossed.
Anyway a little extra work was needed to trim the reinforcement far enough back to cover with cloth/resin etc, and still leave a flat surface for the hinges.
I deviated from the manual advice when match drilling the hinges. Normally this is a bad idea, since Vans usually have a good and well proven reason for techniques.
The manual suggests that you tape the lower cowling securely when satisfied with its location, and then remove the upper cowl to gain access to the hinges for bracing during drilling. Of course this means that the front support (clecos in the upper cowling) is no longer there.
I just couldn’t see that I would be able to tape the lower cowling securely enough and be confident of no movement, even with the anti-gravity device!
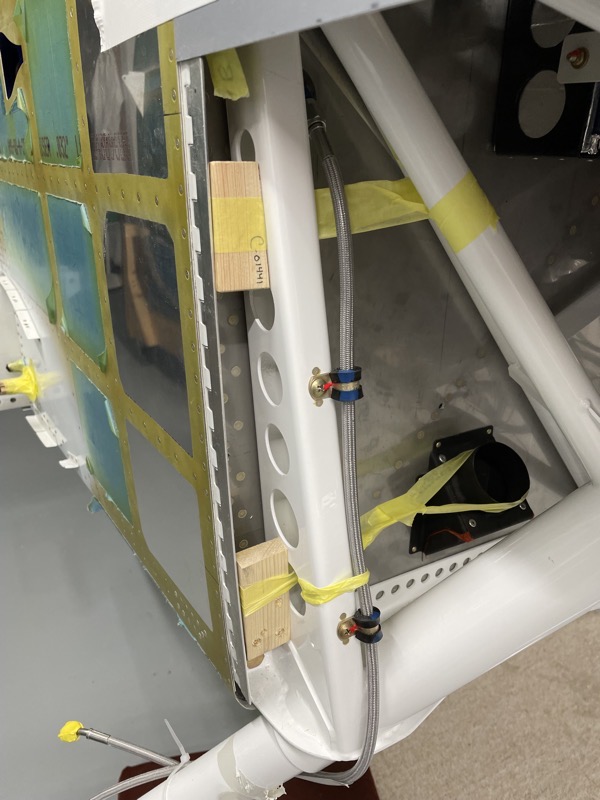
So I decided to make some little wooden bracing blocks, tape them into postion, and match drill with the top cowling still in place providing accurate placement.
Anyway, I found this method worked very well.

Match drilling takes a while, since you’re advised to alternate sides whilst working up from the bottom.

Once all the holes were drilled and clecoed, I removed the top cowl.
This was the first time I’d tried removing the cowl hinge pins whilst accessing them via the oil door. I was pleasantly surprised how easy it was : )
This picture shows how the bracing blocks did their job holding the hinge in place for match drilling.
Lower cowling in place … next job is to fit the Cowl Attach Piano Hinges.


