


JDAir Latch
I had planned to fit the JDAir Canopy Latch right at the beginning of the fuselage build, whilst the left fuselage side was flat on the bench. But then I discovered that, at that time, the Classic Aero Interior side panel was not compatible, so I decided not to go ahead. Happily as time passed, Classic Aero and JDAir collaborated and incorporated a modification so that the side panel and latch worked together.
This meant that I now faced fitting the latch into a built fuselage … as many builders with a quick build fuselage find themselves.
Should I risk cutting holes in the precious fuselage? In for a penny, in for a pound (lots, actually!).

So with bated breath I embarked on the process, since I think the JDAir Latch is a very nice addition to the plane.
The first job is to drill out the rivets securing the lower canopy handle bracket … very carefully, so you can use the bracket again, but this time lower down.
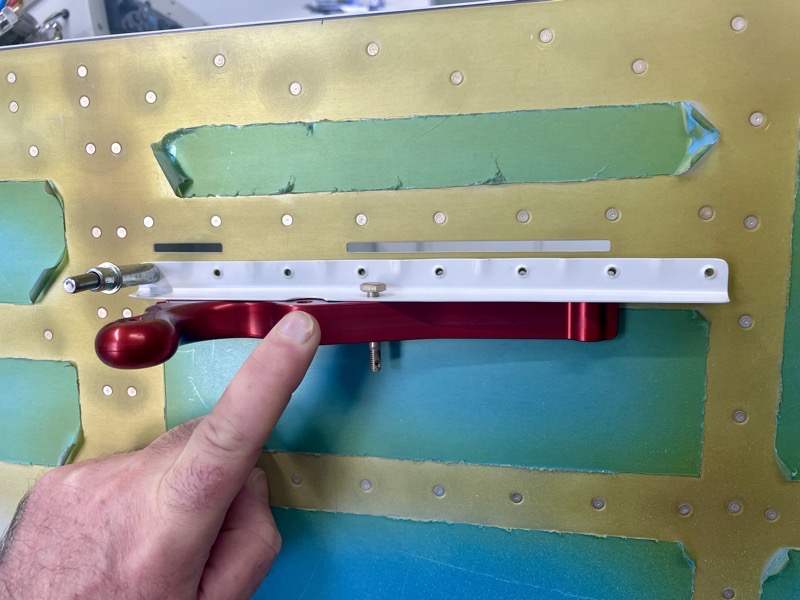
The top of the new latch is fixed by the top of the existing slot.
The fore/aft position is fixed by the pivot point in the top bracket.
So I clecoed on the lower bracket outside the plane in the existing lower bracket holes, and marked the fore/aft hole limits.
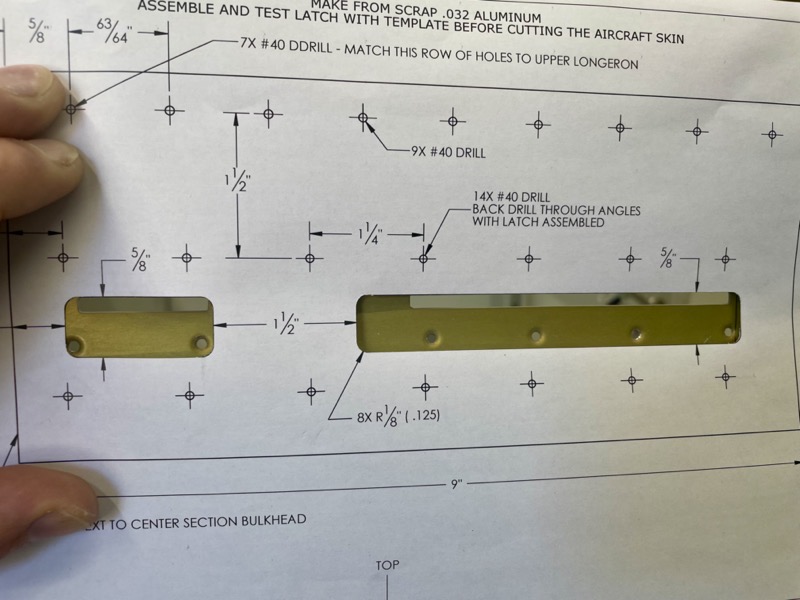
Then I used the JDAir template to mark the hole outlines.
This template is not RV14 specific, so really the only use of it is to provide the hole outlines. It’s up to you to work out where they should be … the preceding description is how I tackled it.
As you can see, the tolerances are very tight, but all but two of the lower bracket rivet holes are removed.

I used a Dremel cutting disc to cut out the slots, allowing a good margin! This was the frightening bit!

Then I carefully opened up the slots with a file, attaching the handles inside periodically to iteratively check the fit.
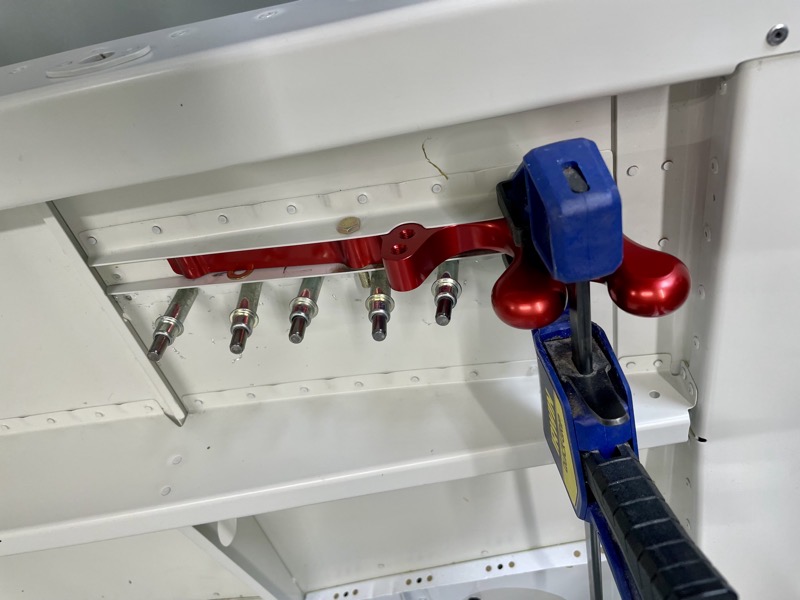
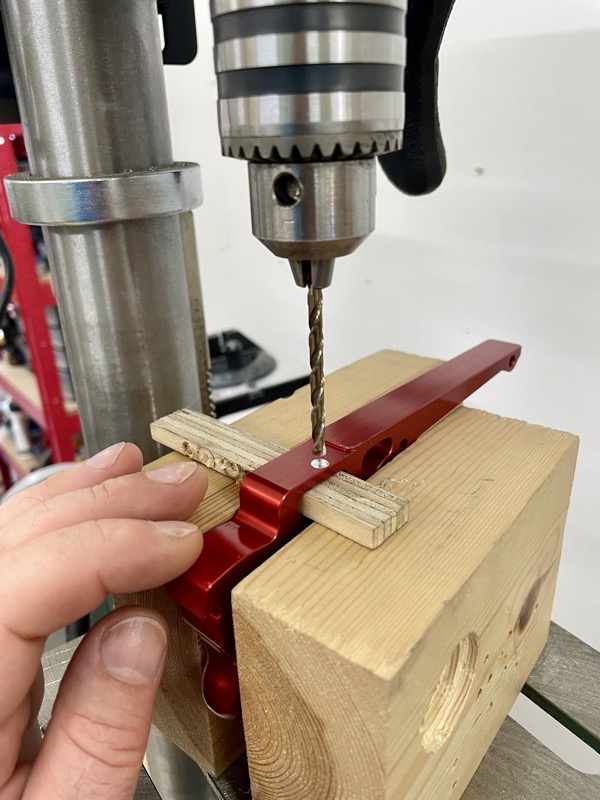
Having attached the handle to the top bracket with the bolt, I clamped the lower bracket to the handle whilst match drilling from the inside out.
I used the usual pop rivet dimple attachment to dimple the holes.

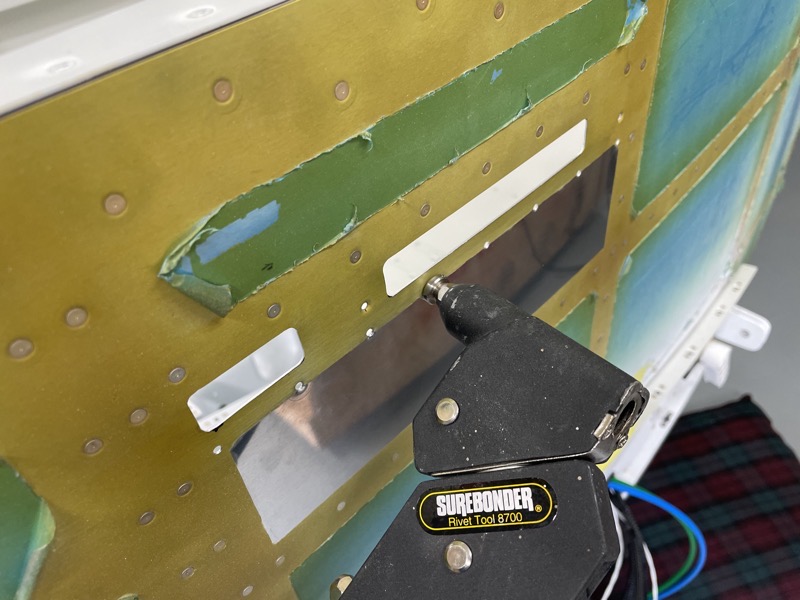
The two arrows show the two rivet holes which need to be filled with “blank” rivets.
The rear one is easy, but the front one is underneath a section of the handle …
… so you have to provide clearance for the shop head.
Some people don’t put a rivet here, and just fill the hole by other means. But I decided to set a shortened rivet just enough to secure it, with the minimum size shop head.
The handle section with the little clearance hole is completely hidden from view.
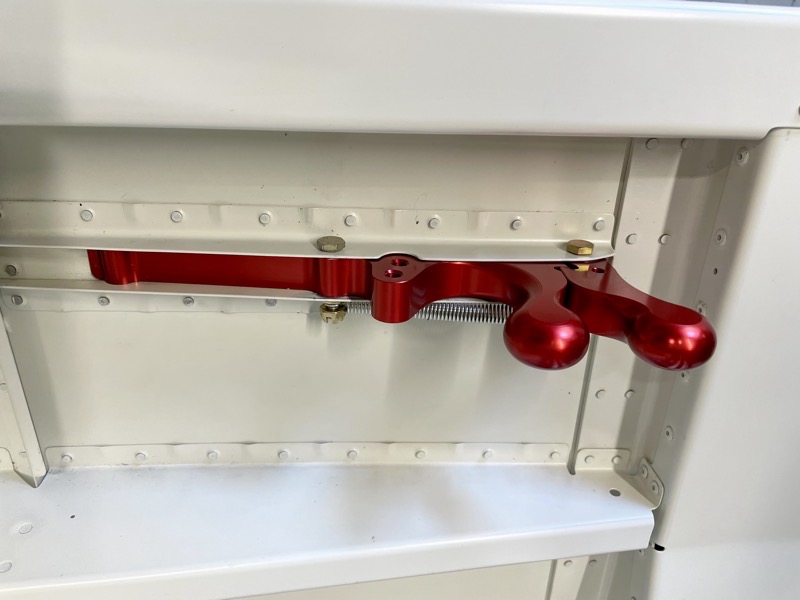
Here’s the installed handle, with the little spring providing a satisfying crisp locking action.
Here’s a short video showing the handle in action.


3 comments on JDAir Latch
Welp, I am following your work here and doing the same thing. I was all set to go with the stock part myself but I also changed my mind. Thank you so much for the details and confirming what I really wanted to do.
You will not regret fitting the JDAir Latch … it works very nicely and looks great.
I saw an RV-14A fuse where the builder had made a mistake whilst cutting the slots for the JD Air latch. Consequently, Steve’s comment above about the “frightening bit” echoed my own feelings about cutting into the side skin of my QB fuse. So I designed a template that fits the holes for the row of top bracket rivets and guides you in making the two slots and the row of rivet holes for the bottom bracket. I had it made out of 0.063″ 304 stainless steel by SendCutSend. It helps you “color inside the lines” with a file and/or Dremel tool. It’s critical to envelope the top edge of the slots Van’s cuts and the forward and aft rivet holes that Van’s drills for the bottom bracket, while respecting the dimensions of the C-01422 brackets Van’s provides, unless you want to make your own brackets out of aluminum angle. (JD Air has instructions for making brackets, intended for other RV models.)
I gave Brian Beatty at JD Air the rights to the template. Brian has designed a template that guides you in cutting and drilling aluminum angle material to make latch mounting brackets.
JD Air has an RV-14-specific instructions at https://www.jdair.com/content/RV14%20Canopy%20Latch%20Instructions.pdf.
It is a handsome latch mechanism, and should work well with my Classic Aero interior side panel.