


Section 30 – Rotisserie and Rivets
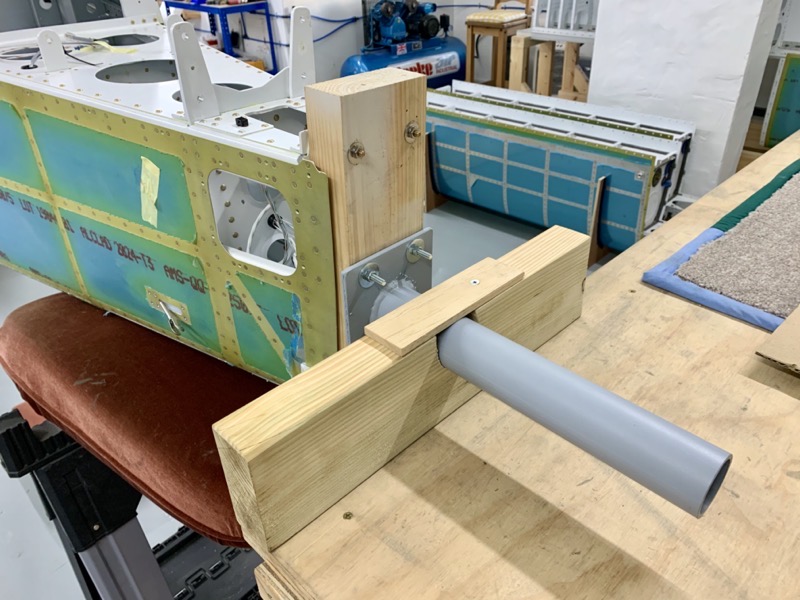
We fabricated a front rotisserie pivot from some steel strips, bent into struts to provide clearance from the firewall attachments. These are secured using temporary longeron bolts.
To provide rigidity for the steel struts we bolted on a sheet of plywood.
Tim got a local company to weld up a pivot and backplate from tubular steel, and we bolted this on through the plywood and the steel struts where they crossed in the middle.
At the back we bolted on a piece of 4×2 wood using the fin attachment holes.
Then bolted on another pivot.
We screwed chunky pieces of wood onto the workbenches to act as a bearing for the pivots.

An extra pair of hands was required to help position the fuselage and adjust the gap between the benches etc (Thanks Coral!)
NB the safety strap thrown over a beam in the workshop. I’m assured the pivot welds are sound but the thought of them breaking fills me with horror!
I have a support under the tail as well : )

I was concerned that before riveting, with everything attached with clecos, it would not be secure enough to use the rotisserie. But it was so firm, and with support of saw horses underneath it has been just fine.
It has made access for riveting much easier : )
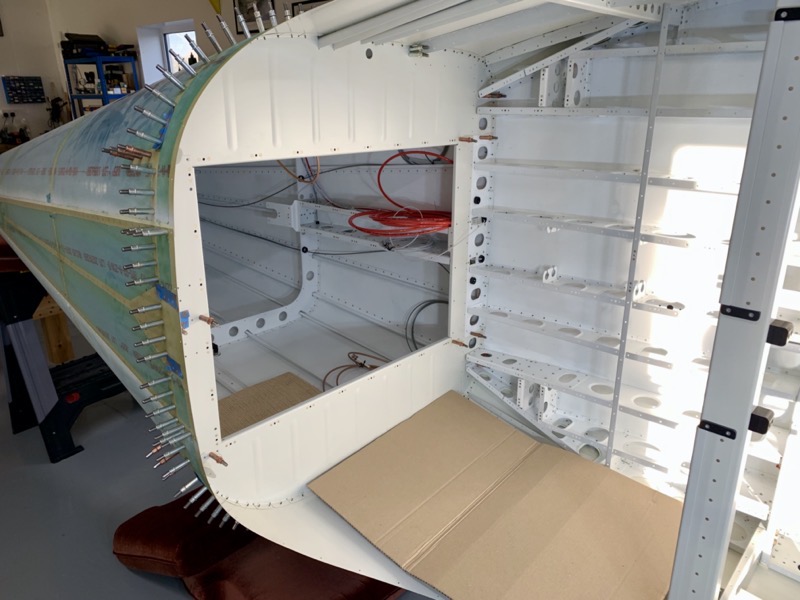
Lots of protection for the skins in case of droppages.
Also the wires/cables in the back needed to be secured to avoid disasters as then fuselage is rotated.
We have been closely following Vans’ advice about the riveting order, they are very specific.
But being able to rotate the structure is so useful.
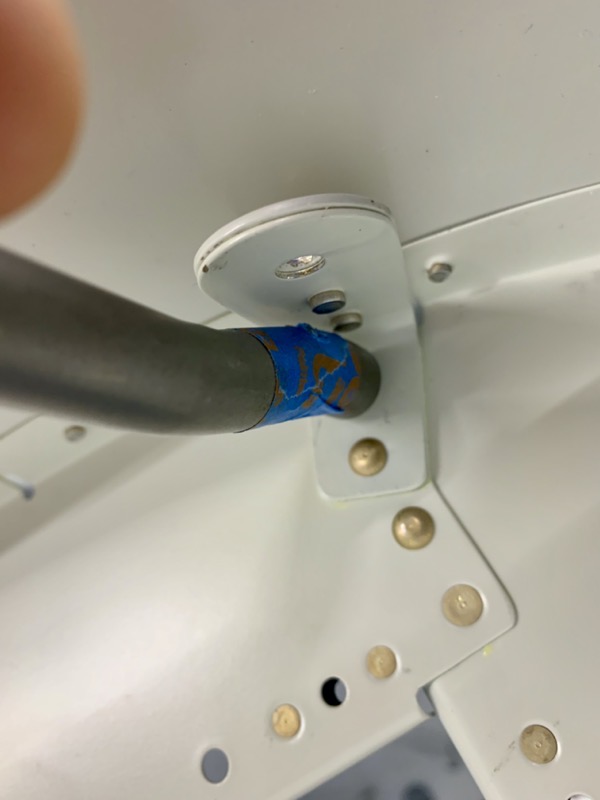
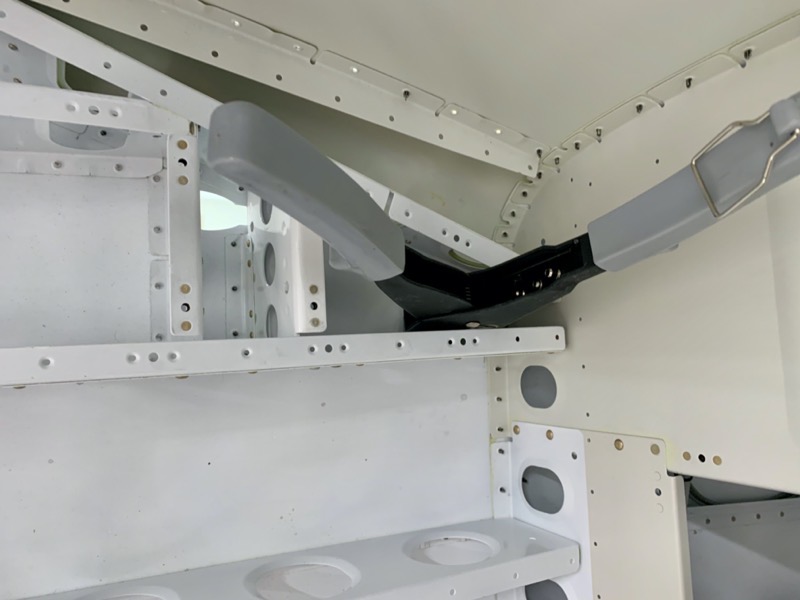
Shoulder Harness Lug
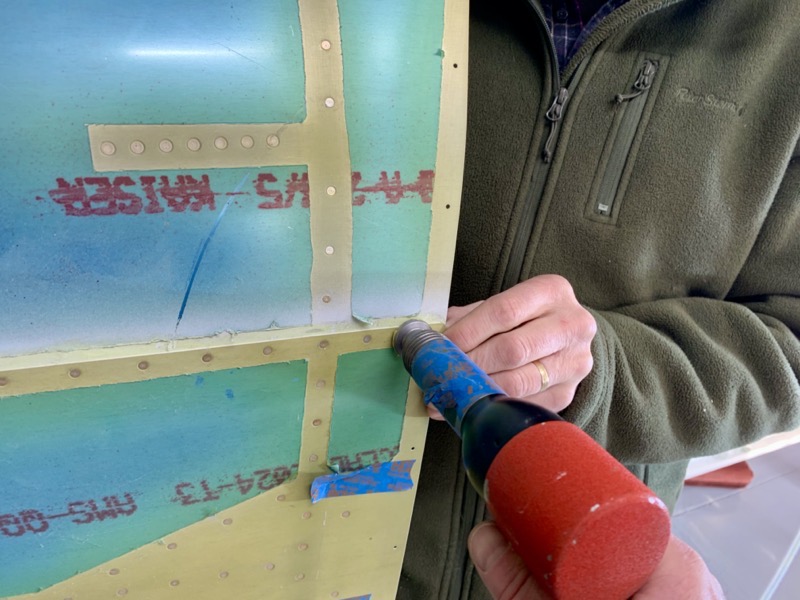
The top rivet is difficult to access … we took a deep breath and used the offset rivet set, which is normally best avoided in our experience.
Actually they set just fine.
As always the really awkward rivets are the ones down in the bottom.
Luckily the bottom ones in each baggage rib are LP4-3’s. But still tricky to get access for the pop riveter … wedge required!
I was able to use my Pneumatic Gun for the middle ribs, but not for the F-01425’s on the outside.
The very outboard baggage ribs F-01423B’s are not riveted at this stage, to allow them to be deflected slightly to get access for setting the bottom skin rivets in that area.
We are planning to finish the riveting in the next couple of days.


2 comments on Section 30 – Rotisserie and Rivets
Wow Steve, that’s a great bit of kit. I was just thinking the best way to get around the battery box. What size steel is that?
Hi Mike the steel is 50mm x 3mm. Too flimsy on its own, but when bolted to the plywood sheet is really firm. So far doing the job nicely.